As per the configuration of Projectopia is concerned, you don’t need much configuration.
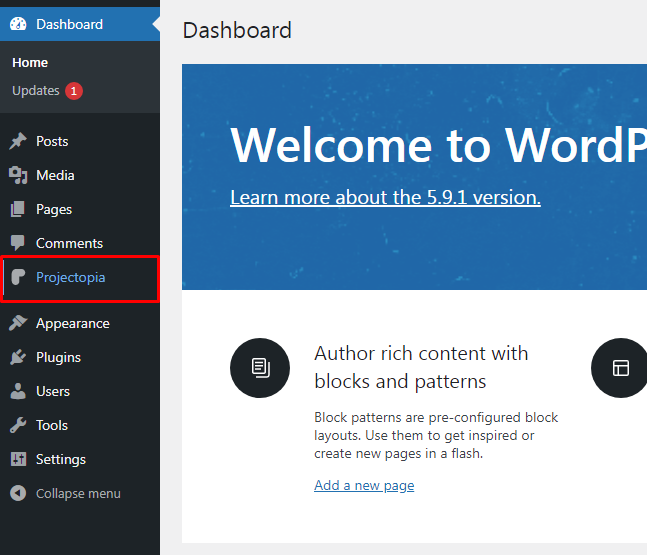
Upon the activation of the plugin, you can view the Projectopia option on the left sidebar of your WordPress Dashboard.
However, you need to configure few components to get started efficiently with the plugin.
Projectopia also offers premium version of the plugin.
It enables you to upgrade to premium version directly from the site dashboard.
- Head to Projectopia>>Upgrade
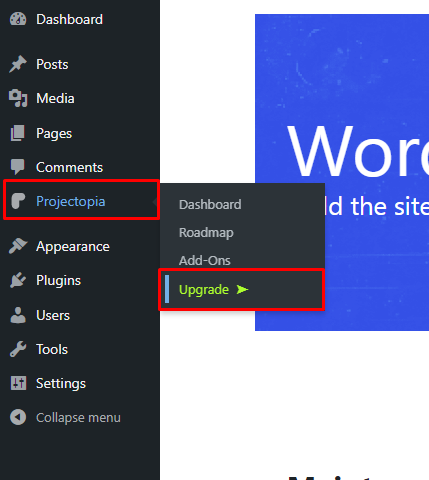
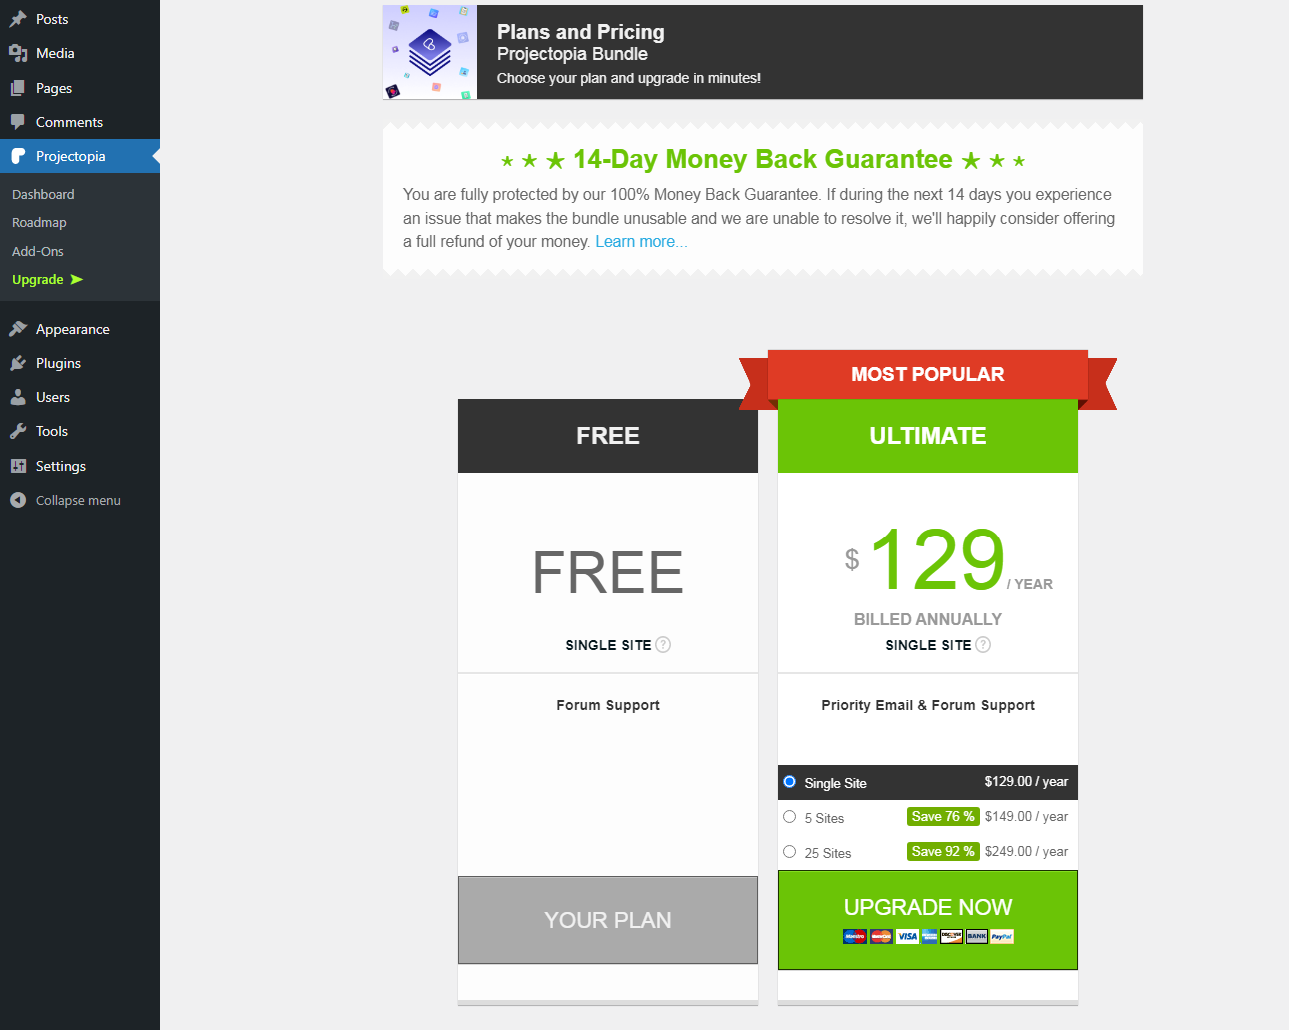
You can enjoy enhanced features with the premium version of the plugin which starts from $129/year
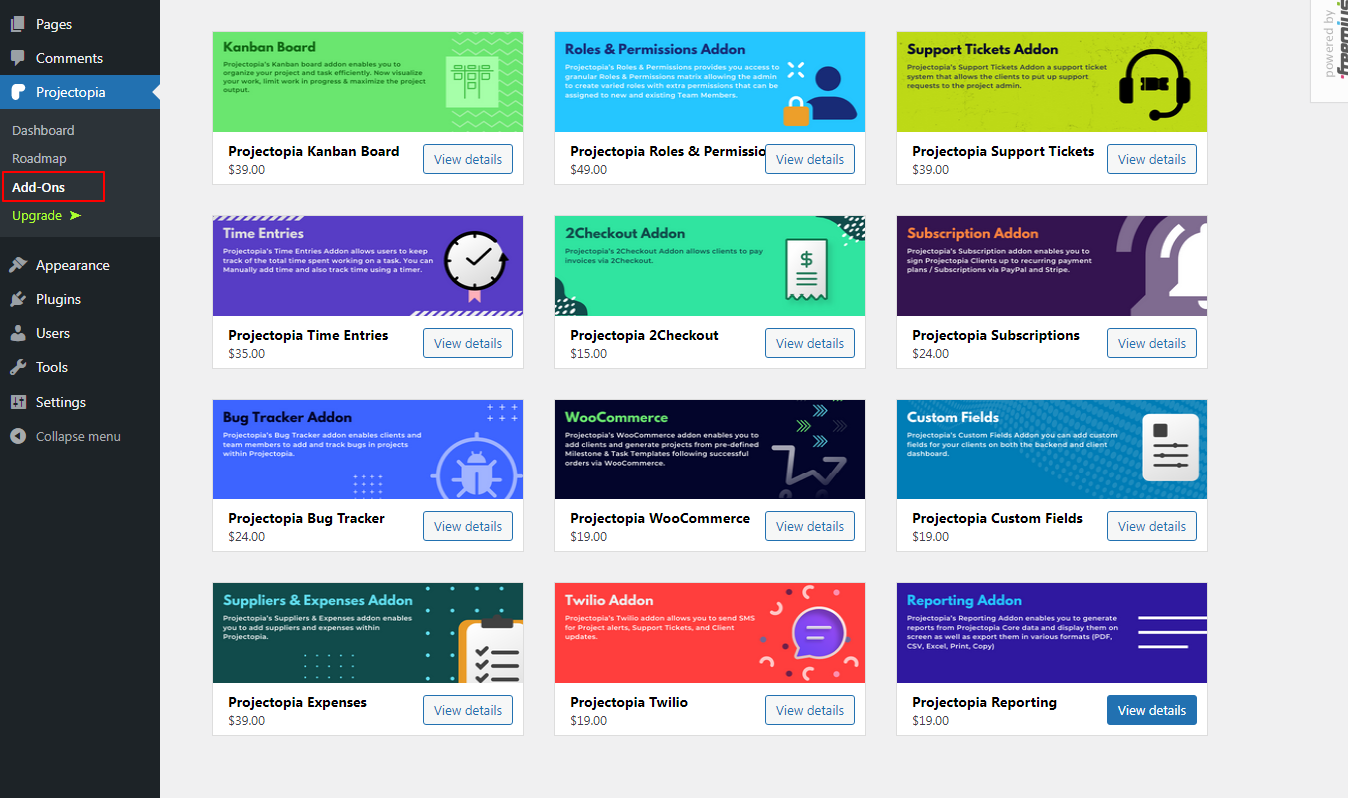
The plugin also allows you with the option to pay only for the premium services you choose i.e Add-Ons.
With the purchase of the Add-Ons, you can select the features you would like to use and only pay for that.
- Head to Projectopia>>Addons
Simply view the services you would like use and manually purchase it.
After the purchase of the premium plugins (upgrading the plugin) or specific addons, it’s now time for the configuration.
In the configuration, we’ll walk through each of the tabs in the settings.
The settings are grouped by relevant options and correlate to each part of the system.
In order to have a clear understanding about the setting controls, make sure to view the linked pages.
This will provide you better understanding of the process work and how each settings are involved.
Note: Projectopia configures itself on activation so most settings are already completed for you.
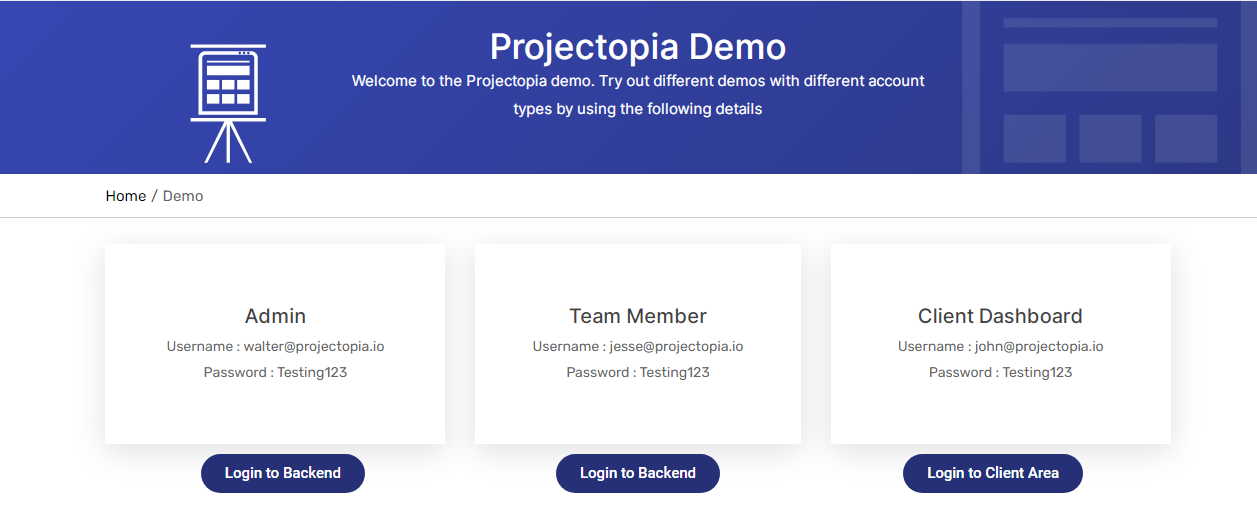
Head to the demo page to view what the default options look like.
The tab contains admin, team member and client dashboard.
Let’s run though the basic settings.
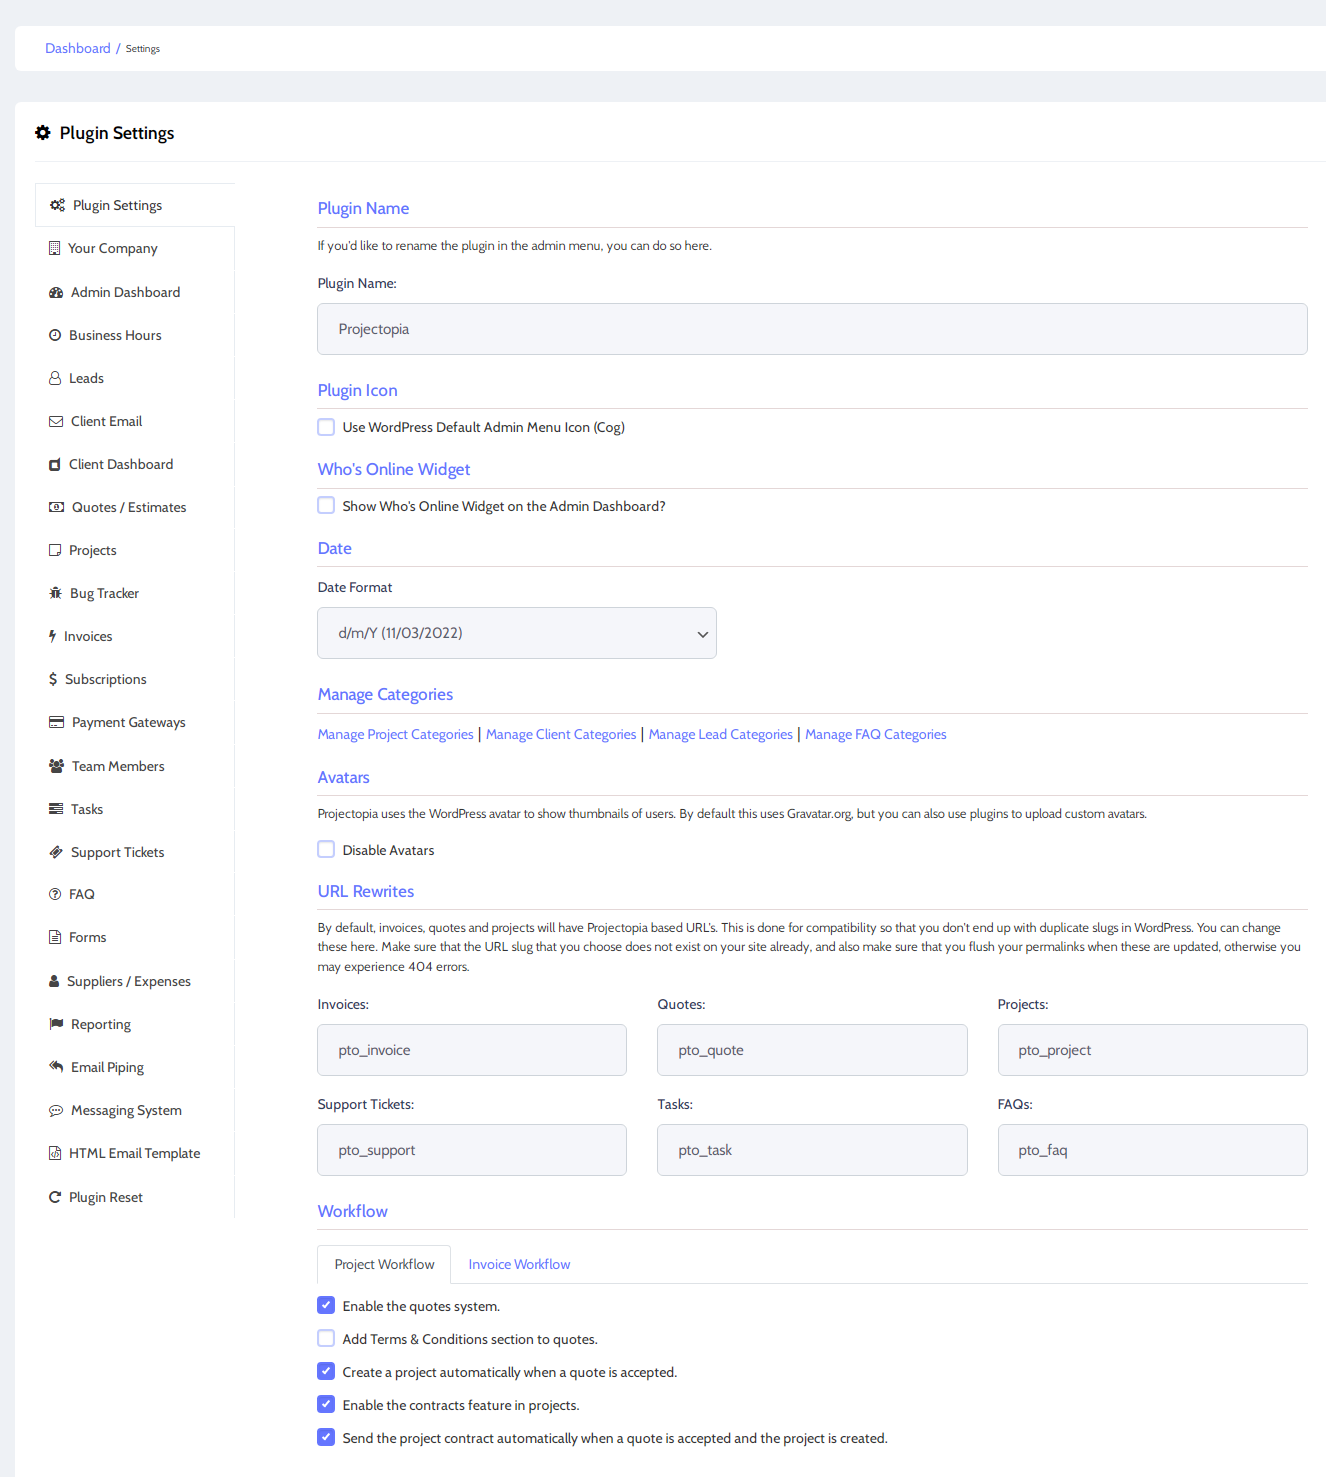
- Plugin Name
By plugin name, it refers to the name of the plugin displayed on the admin WordPress dashboard. By default, it is set to Projectopia, but you can rename it to anything you prefer, eg. “CRM” or “Client Manager“.
- Plugin Icon
Upon clicking on the box the ‘Palm Tree‘ icon will be removed. You can set replace the icon from the WordPress admin menu and replace it with default WordPress ‘Cog‘ icon.
- Documentation Link
You can click on the box to add documentation links on your Projectopia Admin menu. This allows you to get a quick reference to get started.
- Date Format
Select a date format relevant to your country. The particular date format will be used throughout the plugin.
- Manage Categories
This provides links to edit/add/delete taxonomy terms that are used to categorize the elements within Projectopia such as Clients, Projects etc.
- Avatars
By default, Projectopia shows small thumbnail photos in various places of the plugin.
For example: In the header and in message strings in Tasks, Projects etc, Clients and Team Members can add their own Avatars in their profiles.
But, if you would prefer not to show them, you can disable them by clicking on the option.
- URL Rewrites
Projectopia uses its own URL structure.
For Example: The URL of a task might be http://yourdomain.com/pto_tasks/1157.
If you want to reformat the URL structure of Projectopia elements, you can do it here.
Note: Please be aware that WordPress doesn’t allow duplicate slugs, so you should make sure that no other plugins / themes / content types are using your desired slugs before you change them.
- Workflow
The section contains options on how Projectopia manages workflow.
We recommend leaving these as it is until you’ve had a chance to test the plugin and work out how you want your process the flow to be.
These options are explained in more detail further on in the documentation:
The “Your Company” Tab is where you’ll add information and company settings that will be used throughout the plugin.
Company Details
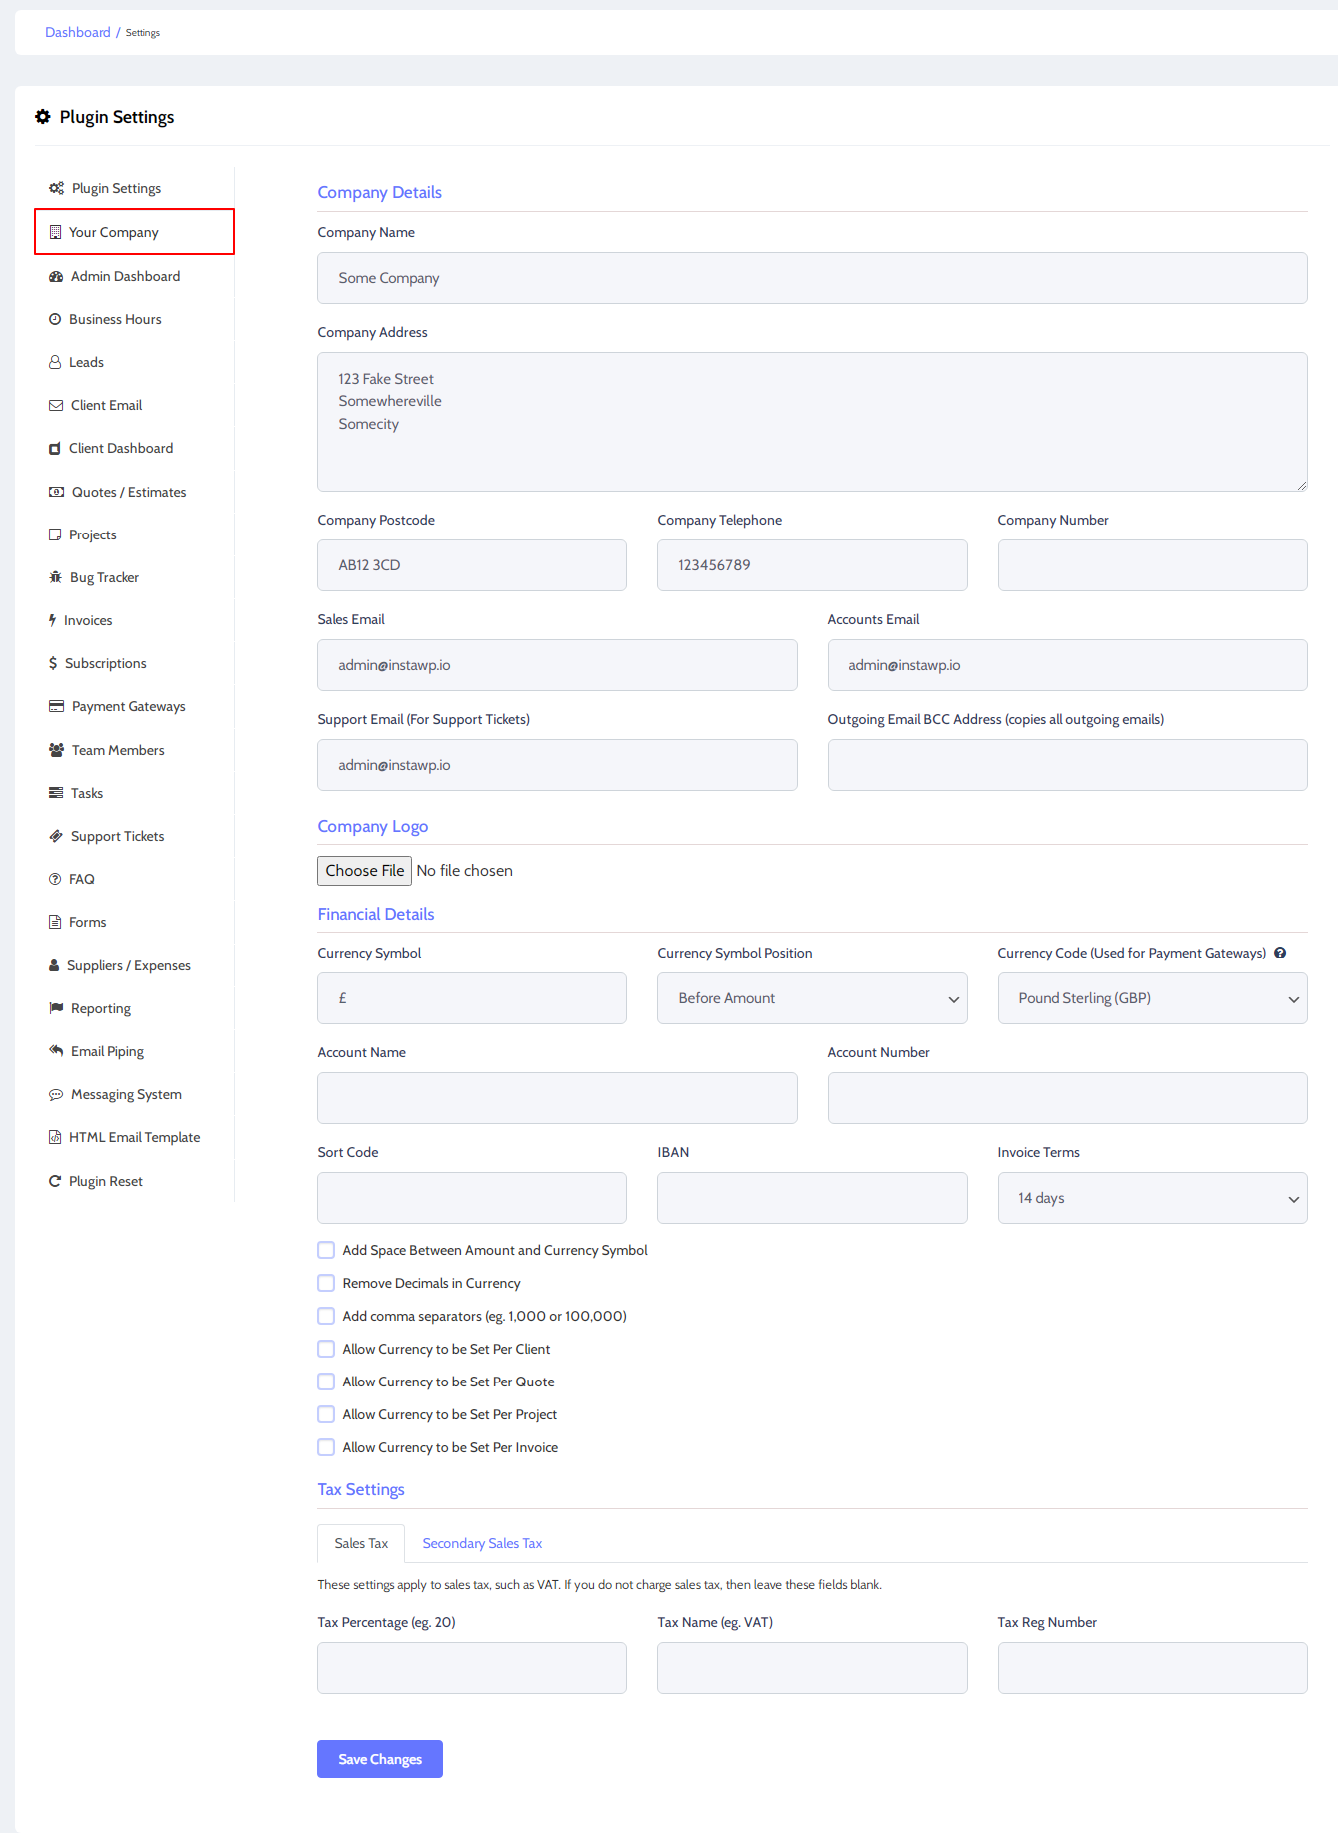
The company details section is for adding basic details about your company that will be used on contracts, invoices etc.
Enter your company name, address, telephone numbers and email addresses.
TIP: There are three email address fields for sales, accounts and support. All three fields must have a value, but you can use the same address in all three if you wish.
Company Logo
The logo will be displayed on the Client Login screen, the client dashboard and on quotes / contracts / invoices.
Financial Details & Tax Settings
The settings allows you to configure how your currency, financial details and taxes appear in the plugin and their specific format.
If you charge sales taxes then you should add the details in the first Sales Tax section. There is an option to add a second Sales Tax that is required in your country.
TIP: If your currency code does not appear in the “Currency Code” dropdown, don’t worry.
This is a list of currencies that are supported by PayPal Payments and is used when using PayPal to accept invoice payments. If you do not use PayPal payments then you should just enter your currency symbol (eg. $ or £) in the Currency Symbol box.
The Business Hours tab allows you to define messages that can be displayed in the client dashboard or via a shortcode anywhere on your site depending on whether you’re open or closed.
The first step is to choose which days you are open and at what times you open and close.
There are two types of messages that can be displayed.
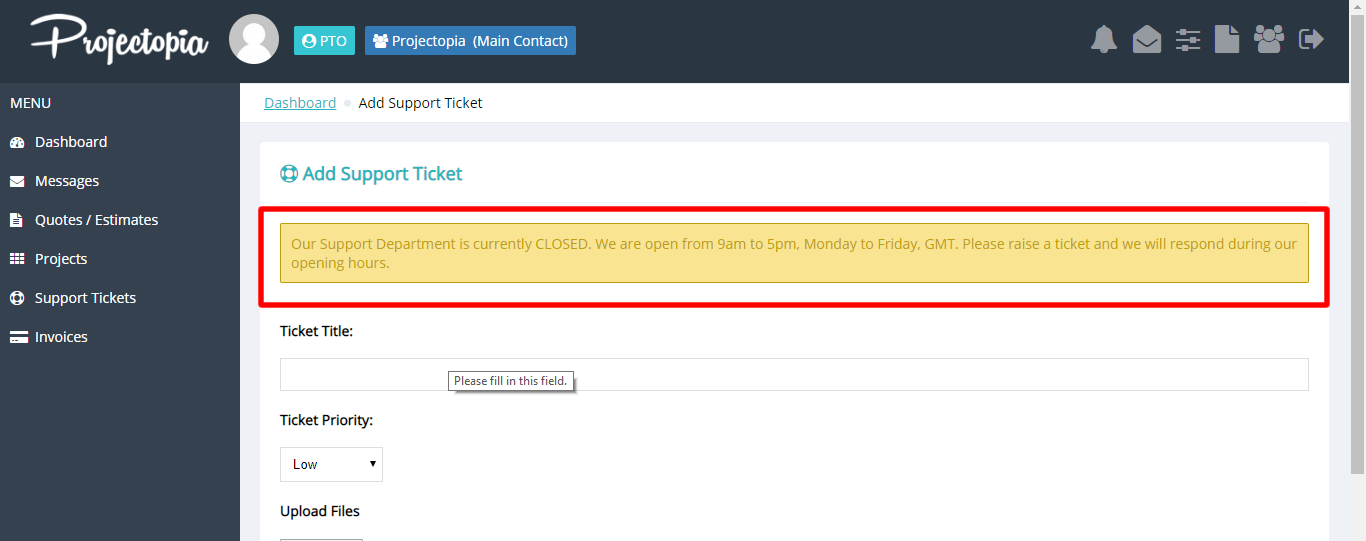
The first can be shown on pages of the client dashboard that are related to Support Tickets. This is useful as it gives the client who is raising the ticket information as to when they can expect a response to their ticket.
To enable this
- Check the “Show an open / closed warning on support ticket pages of the client dashboard” checkbox
- Enter a message to be shown when you are open and when you are closed.
When the client is logged in to the dashboard it will look something like this:
You can also embed this information anywhere on your site by using the The Leads Tab.
At the point of writing there is only one setting required, an email template that is sent to all Team Members with the “View Leads” permission when a new lead is captured by the plugin.
The template is pre-populated with text, so you can safely leave it as it is, or edit it as you wish. The Clients tab contains settings and templates that relate to Client actions.
Let’s run through those now:
Welcome Email
When a client is created in Projectopia, a new user account is created in WordPress and linked to the client.
The welcome email template is sent to the new client at the point of client creation.
View Adding a Client for more information on this feature.
Password Reset
The password reset email is sent to the client when their password has been reset by an admin or team member.
New Contact Settings
The new contact email is sent to the user when they have been added as a client contact.
A client contact is an additional login linked to that client account. It allows more than one person at the client’s organisation to have access to their dashboard.
You can learn more about client contacts here.
TIP: All email templates in Projectopia are pre-populated.
They can be used as-it-is or reworded depending on your requirements.
The Client Dashboard Tab is where you can configure the front-end client dashboard.
More of its explanation is available on the documentation, so we’ll provide a short description and link to where you can read more about each subject.
Client Dashboard Theme & Logout URL

The client Dashboard theme dropdown allows you to choose between rendering the client dashboard in our built-in Projectopia theme or rendering it in your current theme (eg. Avada).
You can read more on this option here – Dashboard Theme Options
The Logout URL field dictates where the client / team member is taken when they log out of their dashboard.
By default this directs back to the Client Login page.
The “Allow Clients to update their details from their dashboard” checkbox provides clients with a facility to edit / update their details from their dashboard, eg. email address, name, address, avatar, password etc.
You can read more on this here – Profile, Files & Custom Fields
The “Allow Clients to grant access to their dashboard & create users for other team members/colleagues” checkbox allows clients to add their own contacts (additional logins) for their colleagues from their dashboard.
If this is not granted then the client can still have extra logins but they must be added by an admin / team member.
You can read more on this here – Client Contacts
Client Registration
This checkbox allows new clients to register from the Projectopia login page.
More details on this can be found here – Client Registration Forms / Methods
Dashboard Password Reset
The dashboard password reset template is sent to the client when they request a password reset from the login screen of the client dashboard.
You can read more on this feature here – Password Reset
This template is pre-populated and can be used as-is or reworded depending on your requirements.
The Quotes / Estimates tab holds default values that are used when setting up a Quote / Estimate.
These values can be overriden on a per quote basis. See Quote Metaboxes.
Header, Footer and Default Quote Acceptance Text
The header, footer and default quote acceptance text fields are default values that are added to new quotes when they are created.
These values are pre-populated so can be used as-is or modified as needed. See Previewing a Quote for an example of where these elements appear on a quote.
Quote Emails
This email template is sent to the client when an admin or team member “sends” the quote.
View Sending a Quote for more information on this feature.
This template is pre-populated so can be used as-is or modified as needed.
The Projects tab also holds default values and email templates that are used when creating and managing Projects.
Terms & Conditions
The default terms & conditions drop-down allows you to select which terms template you want to add to project contracts by default (if you have project contracts enabled).
See Contract Terms Templates for more information on this feature.
Contract Acceptance Text
The contract acceptance text appears on the contract above the signature box when the client is sent the contract to e-sign.
View Previewing a Contract for more information on where this element appears on the contracts.
This value is pre-populated and can be used as-is or modified if you wish.
Contract Emails
This email is sent to the client when a contract is “sent” to them.
Check out Sending Contracts for more information on this feature.
This email template is pre-populated and can be used as-is or modified if you wish.
New Message Emails
These email templates are used when a client or team member sends a message in the Project Messages section.
See Project Messages for more information on this feature.
These email templates are pre-populated and can be used as-is or modified if you wish.
The Bug Tracker tab contains email templates used by the Bug Tracker Add-On. Please see the Bug Tracker page for more information.
The Invoices tab holds configuration settings and email templates for the Invoice system. See below for links to relevant documentation for each feature.
Invoice Prefix
The Invoice Prefix field is used to set a prefix that will appear before the invoice number when invoices are viewed in the client dashboard.
This can be set here on a global level but can also be overriden on a client level so that each client has a different prefix. See Invoice Number Prefixes for more information on this feature.
Invoice Template
Projectopia currently has three invoice templates to choose from, depending on your own taste.
We plan to release more with each update. You can set which one you want to use here, along with a main colour.
See Invoice Templates for more information on invoice templates.
Invoice Logo
By default, the logo displayed on the Invoice will be the one that is uploaded on the Your Company tab of the settings. However this can be overriden here if you wish.
PDF Invoice Email Attachments
The PDF Email Attachments feature allows you to attach a PDF Invoice to the invoice email that goes to the client.
It will also be attached to any reminder / overdue emails that are sent out. The template used in the PDF will be the one that you have selected in the Invoice Template section above.
To find out more about this feature, visit PDF Invoices
Partial Invoice Payments
Projectopia allows you to set invoices to accept partial payments when being paid by Stripe or Paypal (and 2checkout with the relevant Add-On). This can be activated here on a global level but can also be overriden on a per-invoice basis.
Invoice Reminder Settings
Projectopia can be configured to send automated invoice reminders to the client if the invoice remains unpaid.
It currently supports three emails. 2 reminders and one overdue. You can configure the offsets here.
Please see Invoice Payment Reminders
IMPORTANT: Invoice reminders require the use of WP Cron, which some hosts block access to. Please check that you have access to wp cron, otherwise these settings may not work properly.
Invoice Footer
The invoice footer field appears on the bottom of invoices that are sent to the client or viewed in the client dashboard.
It is useful for adding payment instructions or bank details to your invoices.
See Invoice Templates for an example of where this appears on the invoice.
Invoice Emails
Client Invoice Email
This email template is used when an invoice is “sent” to the client.
See Sending Invoices for more information on how emails are sent.
Client Deposit Invoice
This email template is used when a deposit invoice is “sent” to the client.
See Sending Invoices for more information on how emails are sent and Invoice Workflow for information on which invoices are sent, and at which point.
Client Invoice Reminder Email & Client Invoice Overdue Email
These templates are used when invoice reminders are sent from the system. See Invoice Payment Reminders for more information.
Client Payment Notification Email
This template is used when a payment has been added to the invoice, either manually or via a payment gateway.
It is sent to the client and to any user who has the View Invoices permission.
See Adding Manual Payments and Payment Gateways
TIP: The email templates on this settings tab are pre-populated and can be used as-is or modified to suit your needs.
The Subscriptions tab contains email templates used by the Subscriptions Add-On.
Please see the Subscriptions page for more information.
The API / External Services tab holds settings for Payment Gateways: PayPal, Stripe and 2checkout.
Please see Payment Gateways for more information on how to configure these settings.
The Team Members tab holds email templates that are sent to team members when various actions are taken.
New Account Email
This template is used when an admin or team member adds a new team member.
Please see Adding a Team Member for more information.
Password Reset Email
This template is used when an admin resets a Team Member’s password. The team member will receive an email with their new password.
New Project Email
This template is used when a team member is added to a project by an admin or another team member.
See Adding Team Members to Projects for more information.TIP: The email templates on this settings tab are pre-populated and can be used as-is or modified to suit your needs.
Task Update Email
The Tasks tab contains an email template for task update notifications.
See Updating a Task for more information on this feature.
TIP: The task update template is pre-populated and can be used as-is or modified to suit your needs.
Disable Support Tickets
This checkbox will disable the support ticket system.
See Disabling the Ticket System for more information on this feature.
New Ticket Email
This template is used when a client raises a new support ticket. See Adding a Ticket
Updated Ticket Email
This template is used when either a client or a team member updates a support ticket.
See Adding Messages to Support Tickets
TIP: The email templates on this settings tab are pre-populated and can be used as-is or modified to suit your needs. The FAQ system is used to display frequently asked questions in the client dashboard or anywhere on your site via shortcodes.
FAQ Settings
This checkbox is used to activate or deactivate the FAQ system.
FAQ Categories
You can use this feature to create / edit / remove categories that FAQs are linked to.
Client Dashboard
You can use these settings to control whether or not the FAQ system appears as a link in the client dashboard sidebar.
FAQ Shortcode
The FAQ can also be displayed anywhere on the site using a shortcode.
The Forms tab holds settings for the several forms that are available in Projectopia. The two main forms are for raising quotes and for client registration.
Frontend Quote Form
This setting allows you to select a form to use on the frontend via a shortcode.
You can choose any form created as an anonymous form in the Quote Forms part of the plugin.
See Frontend Quote Submission for more information.
You can also choose whether or not to send a welcome email with login details when the form is submitted and whether or not the client that is generated by the form requires approval.
Client Registration Form (No quote Required)
This is a simple shortcode [cqpim_registration_form] that creates a new client. It can be placed anywhere on your site.
See Client Registration Forms / Methods for more information on how to use this form.
Dashboard Quote Form
This form is used in the client dashboard and is for existing clients to submit quotes.
You can choose any form created as a Clint Dashboard form in the Quote Forms part of the plugin.
See Frontend Quote Submission for more information.
Form Confirmation Fields
These options enable you to add check-boxes to your quote forms to confirm that the user has read your terms & conditions and Privacy policy.
You can link to the relevant pages. The user will not be able to submit the form without checking these boxes.
See Frontend Quote Submission for more information.
Form Emails
This template is used when a quote is submitted either by an anonymous frontend form or a client dashboard form.
It is sent to the sales email address that is set in the “My Company” tab of the plugin settings.
The Suppliers & Expenses tab holds settings for the Suppliers & Expenses Add-On.
See Suppliers & Expenses for more information on this Add-On plugin.
The Reporting tab holds settings for the Reporting Add-On.
See Reporting for more information on this Add-On plugin.
Email Piping allows your WordPress site to receive email via an IMAP connection to an external mailbox. As Email Piping can be rather complex, we have a dedicated documentation page that explains how it works and how to configure it.
Please see Email Piping for more information on this feature.
The direct messaging system allows Team Members and Clients to directly message each other. There are only a few settings for he Messaging System, we’ll run through them here.
Enable Messaging System
These two checkboxes allow you to enable to messaging system for Team Member and for Clients.
If you want to just allow messaging between team members then you should just activate for team members.
Please see Direct Messaging System and Messaging System (Client Side) for more information on this feature.
New Message Notication
This template is used to send an email notification when a new message is sent.
It will be sent to all members of the “chat”. As with all email templates, is it pre-populated but can be modified to suit your needs.The HTML Email Template feature allows you to wrap outbound emails in an HTML template.
By default, emails are sent in plain text which, while functional, is rather dull! Please see HTML Email Templates for guidance on how to use this feature.The Plugin Reset tab is available only to WP Admins (It’s not even available to Projectopia Admins). It’s dangerous.
As the name suggests, its function is to wipe Projectopia data completely and disable the plugin.
Please see Resetting the Plugin for information on how to use this feature.