TIP: This article is for information on how to add a client via the admin panel. If you want to know how clients can register themselves via forms, see Client Registration Forms / Methods To add a client in Projectopia, first go to the Clients area by clicking “Clients” in the Projectopia admin menu.

Then click “New Client”.

You’ll now be presented with a series of fields to complete. These fields are all required as they are used in various parts of the plugin. Fill in all fields as illustrated below and click Add Client.
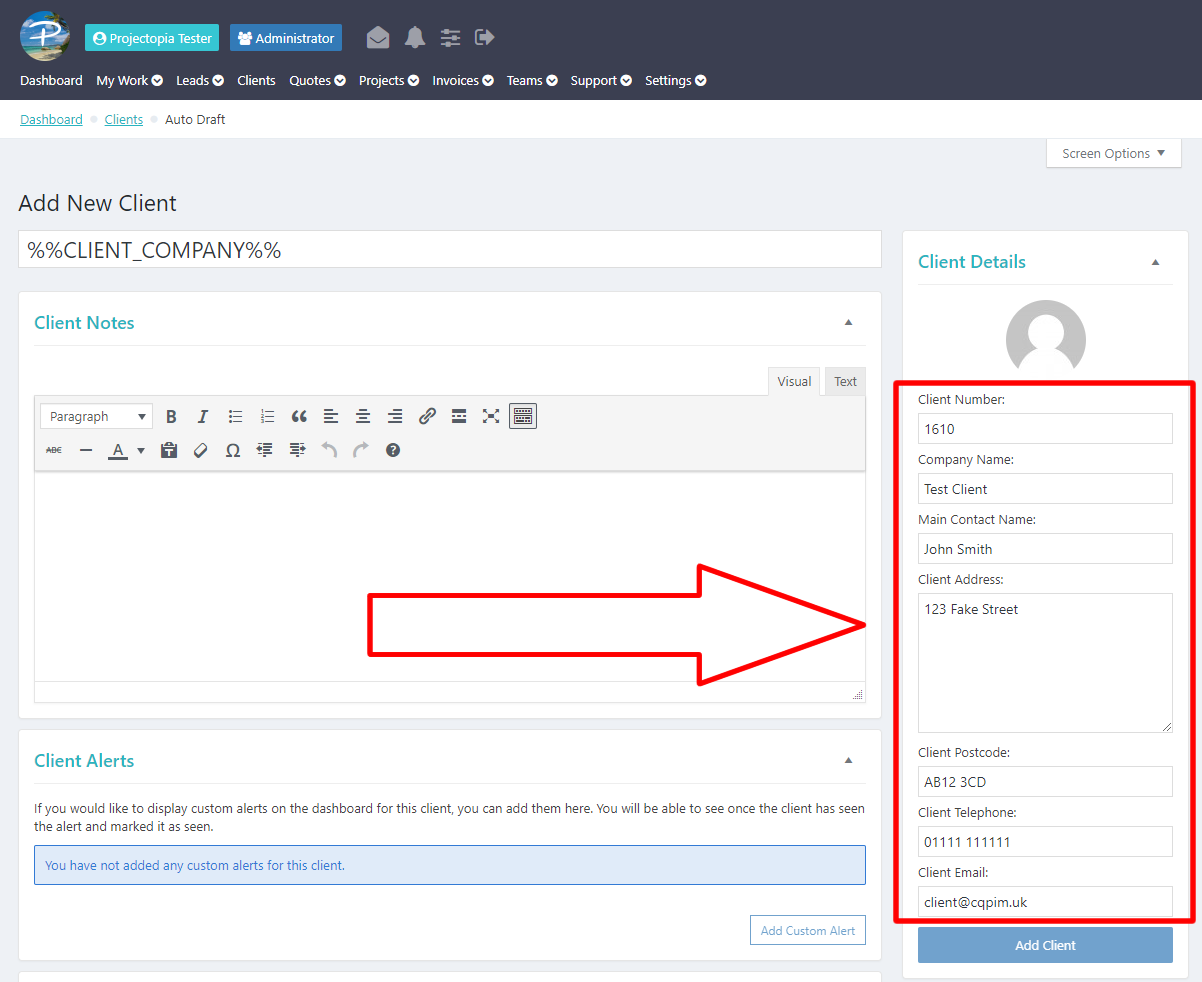
IMPORTANT: When adding clients, you MUST give them a unique email address that is not already in use by any other WordPress user, otherwise you will receive an error. If you already have WordPress users that you want to convert to clients, see Converting Existing Users to Clients.
Add Client Process
Once you’ve clicked Add Client, a few things will happen in the background. These are –
- A Client will be created in Projectopia.
- A new WP User account will be created in WordPress and given the Projectopia Client role.
- The user created in step 2 will be linked with the client created in step 1.
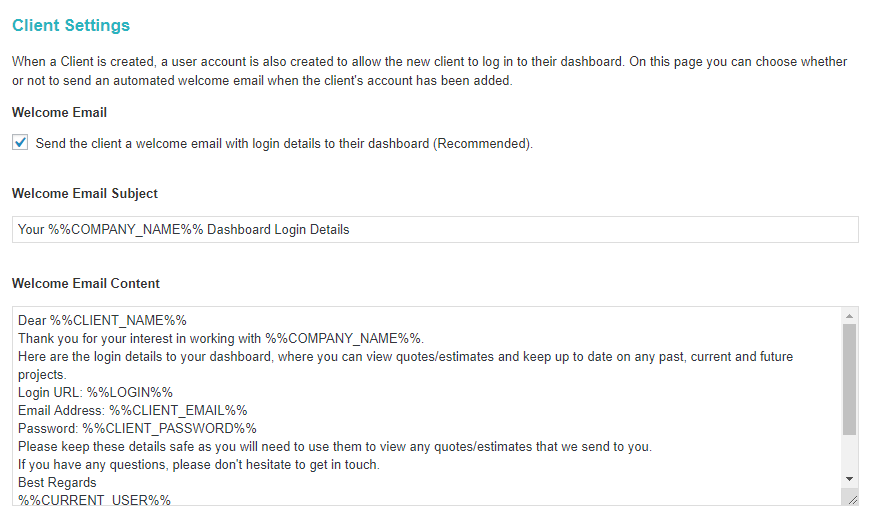
- A welcome email is sent to the new client with their login details (If you have this configured in the settings. See below for more information.
The Welcome Email
If you have configured the plugin to send a welcome email then one will be sent when the client is created. The settings for this are on the “Clients” tab in the plugin settings.
That’s it, you just created your first client!
TIP: To find out what the other metaboxes on the client admin page are used for, see Client Admin & Metaboxes