Projectopia provides functionality to create forms that can be used by new and existing clients to request quotes from the frontend. There are two types of forms at present –
- Anonymous Frontend – This form can be rendered anywhere on your site via the [cqpim_frontend_form] shortcode
- Client Dashboard – This form can be added to the client dashboard via a menu link in the main menu.
There are three steps required to create and assign a form to either the shortcode or the client dashboard, and we’ll go through those in this article.
NOTE: At present there can only be one active form of each type and the forms do not integrate with Gravity Forms at this time, although this is something that we are considering releasing.
Creating a Quote Form
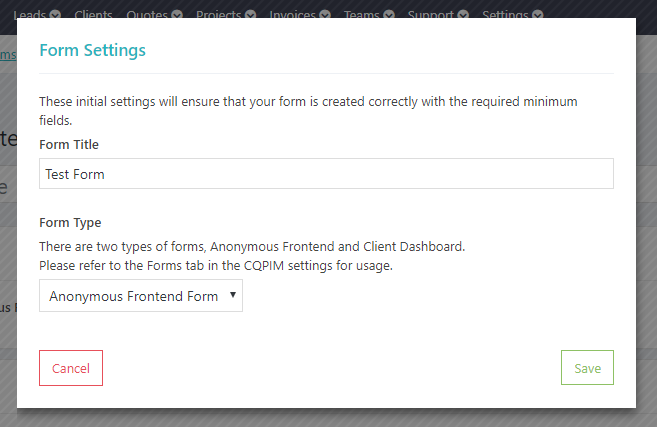
Firstly, you need to create a Quote Form. To do so, Hover over the Quotes header in the admin menu and click Quote Forms, then “New Quote Form”.
Before building your new form, you need to give it a title and choose whether this is an anonymous frontend form (new client) or a client dashboard form (existing client). This is important because for new clients on the frontend, Projectopia will add extra fields that are required to create a new client from the submission.
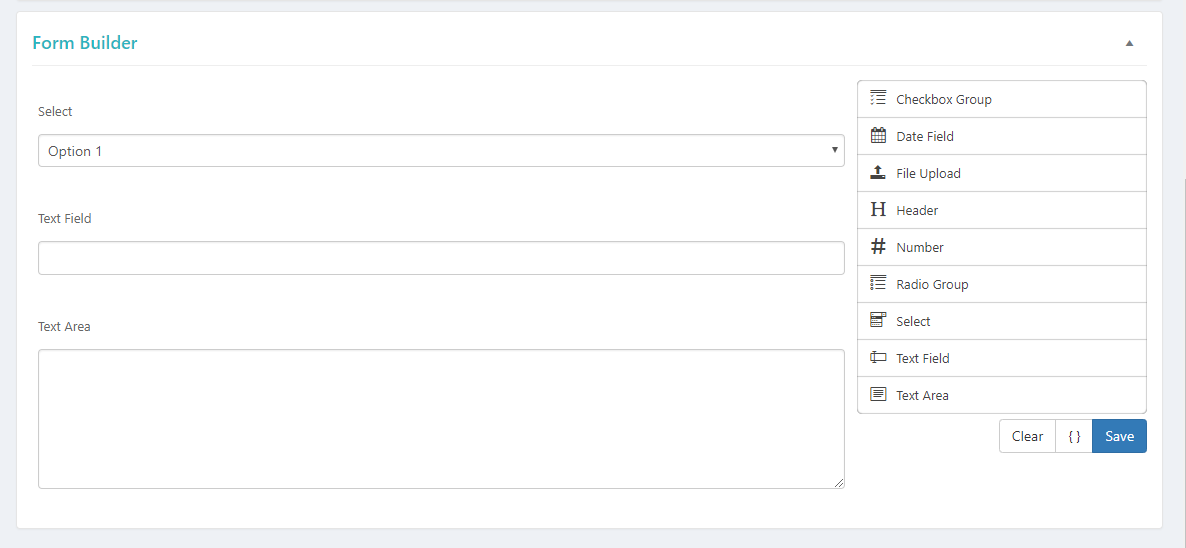
Now that your form has been saved, you can start to add fields. There are several field types available that can be dragged from the field list on the right hand side into the form builder area on the left.
To add a field, simply drag the field type that you require from the list on the right and drop it in the position on the form that you’d like it to be in.
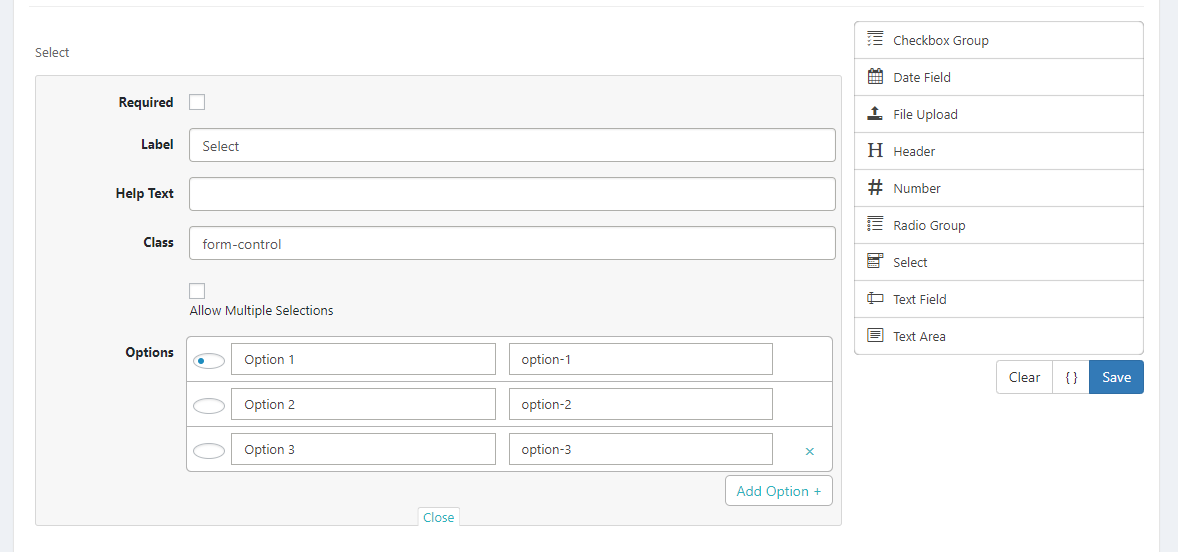
To edit fields, or add values to elements such as dropdowns or checkbox groups, you can hover over the field and click the “Pencil” icon to edit the field.
When you’re done building your form, just click the Save button to save the field data to the database.
Assigning a Form to the Shortcode or the Client Dashboard
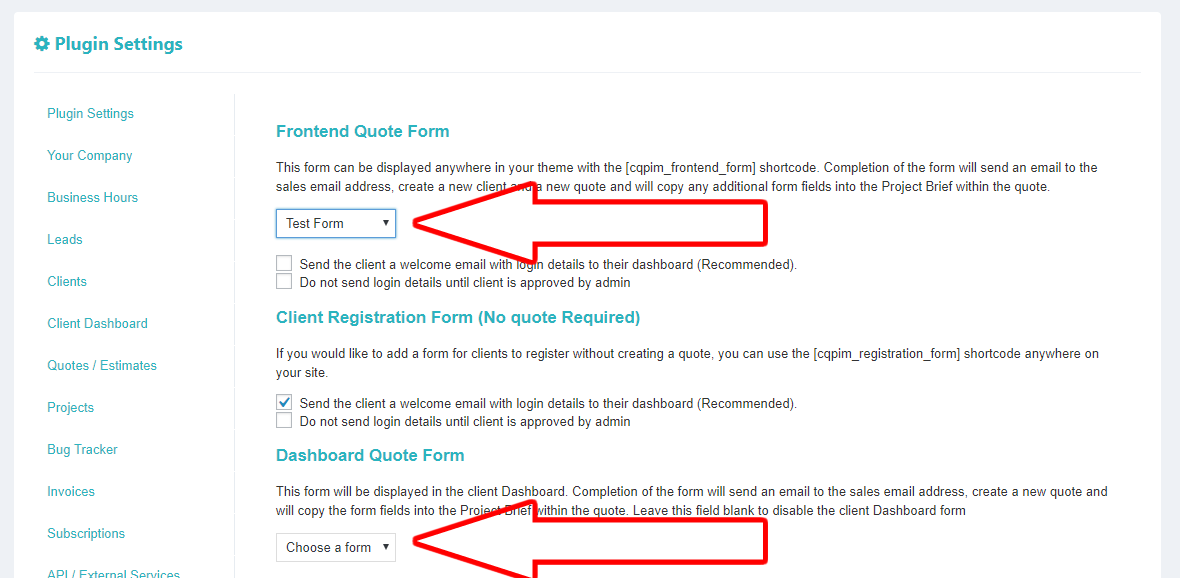
Next, you need to assign one of your forms to the frontend shortcode and one to the client dashboard. To do so, go to the plugin settings and look for the Forms tab. There are two options that can have forms assigned to them, as shown in the image below.
Frontend Shortcode
The form that is selected in the “Frontend Quote Form” dropdown will now be assigned to the shortcode, which can be placed anywhere on your site.
You can also choose whether or not to send the new client login details when they have filled in the form, and whether or not the new clients should be approved by an admin first.
Client Dashboard
The form that is selected in the “Client Dashboard Form” dropdown will be assigned to the Client Dashboard and will display in a menu link in the main menu.
What Happens when a Quote Form is Submitted?
Depending on the form type, the process that runs when a form is submitted is as follows –
- A Client is created using the details provided in the form (Anonymous Frontend Only)
- A quote is created and assigned to the client
- The values of any custom fields on the form are entered into the Project Brief field on the Quote.
- Any file uploads added to the form are saved to the Quote Files area in the Quote.
- An email is sent to the client with their dashboard login details (Anonymous Frontend Only).
- A notification and an email is sent to the admins to let them know that a new quote has been requested.
You can now prepare the quote for the new/existing client using the submitted information and send it when you have completed adding milestones / tasks to the quote.
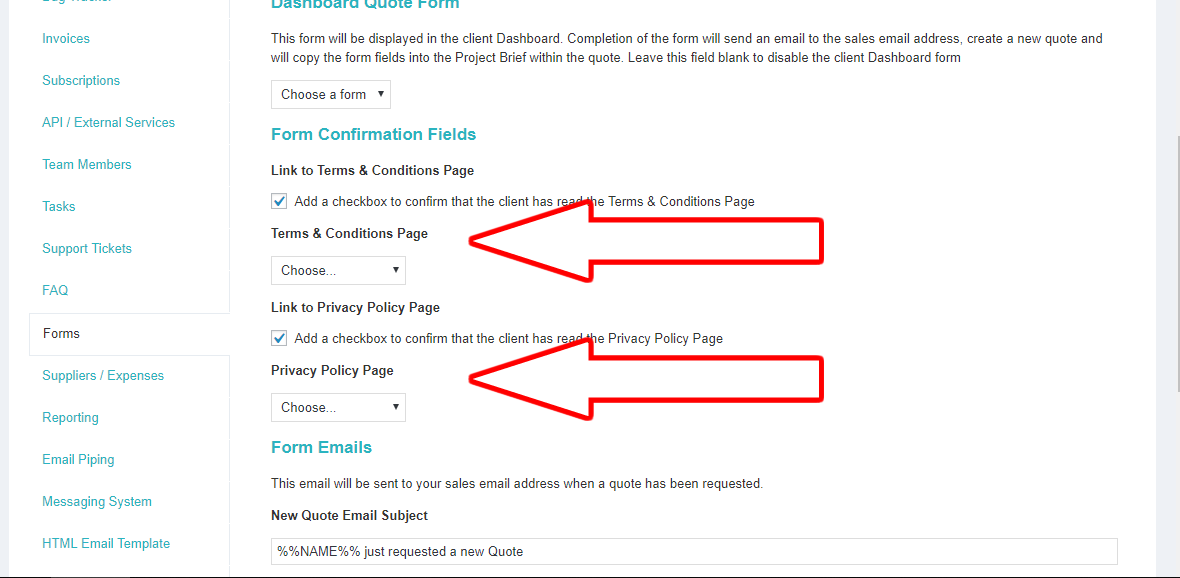
Adding GDPR Checkboxes to your Frontend Form
Projectopia also allows you to add checkboxes to your frontend form to confirm that your new clients have read and agree to your privacy policy. To activate these checkboxes, find the Forms tab in the plugin settings and check the two boxes to enable this feature. You can also choose which pages contain your T&Cs and Privacy Policy.