
Are you and your clients tired of reaching out to each other now and then for small works or just to provide updates? And you want them to have access to the project 24*7 without interrupting you? Then don’t worry, because in this article I am going to explain to you how you can add a client dashboard through wordpress for easy and secure communication.
But before that, let’s take a quick look at what a client dashboard is and why a WordPress custom dashboard is best to use for a secure client portal.
Table of Contents
What is a Client Dashboard
Client Dashboard is a management tool that helps clients to interact and have access with the agency/company. In other words, “Client Portal” is a secure and special place on a website that allows you to create a dedicated area for clients. The space lets businesses share documents or information related to the project with their clients.
It is a modern and easy-to-use system that makes it easier for clients to get an update on the project 24/7. The clients don’t have to reach out now and then for small works and it also provides less strain on the company. It is in-short flexible, secure, and what a company and clients need for better communication.
Why Use WordPress to Create a Secure Client Portal
It is necessary to create a secure client portal so that all the information remains between you and your clients. Therefore, we have WordPress to create a client portal/dashboard that will be both secure and easy to use. The benefits of using wordpress to create a client portal is that:
- It becomes one centralized location to enable businesses/agencies to manage clients and details regarding the project.
- It reduces support cost, as you don’t have to have customer support 24*7 because the client portal becomes a self-support system for clients and other users.
- You can handle all your businesses within WordPress, without worrying about extra tools to work on.
- Another reason to create a WordPress client dashboard is that you can have financial management. In which you can share all the billing updates, and invoices.
These are few reasons to use WordPress to create a secure client portal. Now further I am going to talk about creating a wordpress client dashboard using this WordPress Plugin.
How Projectopia can help?
In this section, I am going to tell you how you can easily create a client dashboard in wordpress with the help of Projectopia.
Projectopia is one of the best WordPress plugins for project management tools. It contains various useful features like Quotes and Estimates, Projects, Clients, Invoices, Client Dashboards, and many more. It has been a savior for many small agencies and businesses, that’s why when it comes to creating a client dashboard WordPress, Projectopia is what comes to mind.
Let’s start with how you can add a client dashboard easily:
Download, Install, and Set-up the Plugin
The very first step is to Download the Projectopia plugin through CodeCanyon.
Then, install the plugin on your WordPress website.
Finally, set up the plugin with the help of Setup Wizard.
Add Client
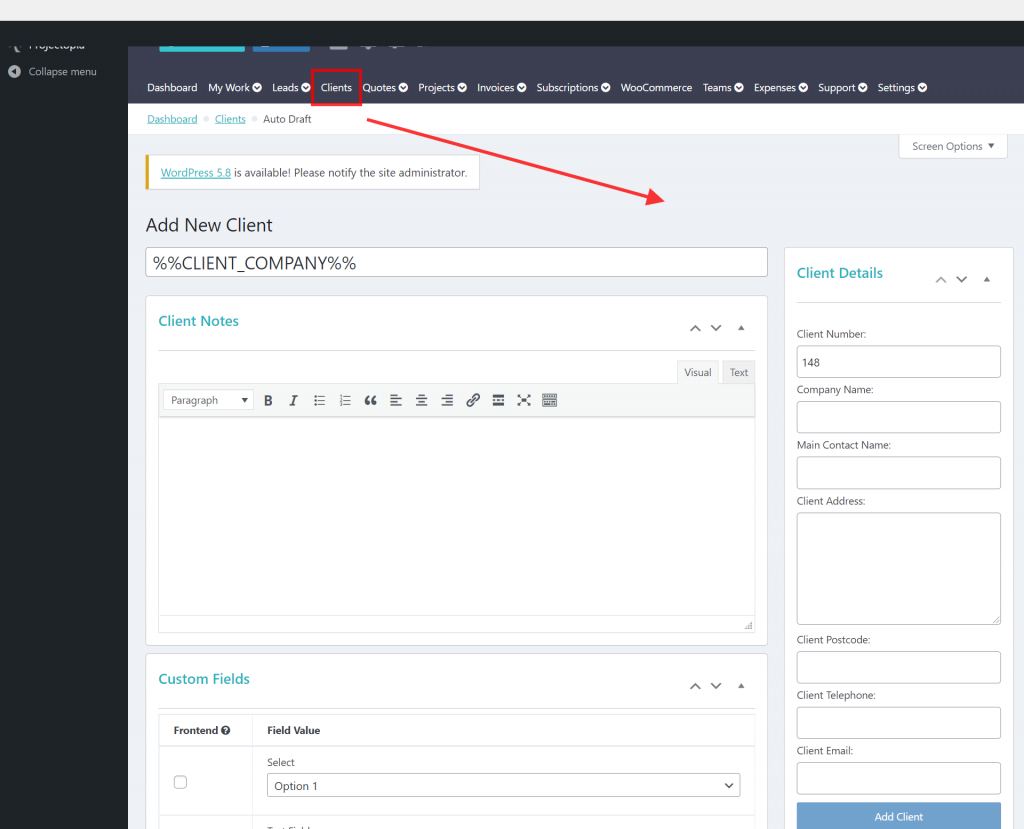
To “Add a Client”, login into the admin dashboard and go to the “Clients” section. There you will see a button as “New Client”, click on it and it will lead you to the “Add New Client” page.
Now you can fill in the client details and then click on the “Add Client” button. Further, fill in the contact preferences and you can also add client files, custom alerts, and client contacts here.
Log in to Client Dashboard
Once the client is added you can share the login credentials with your client manually or through email, it can be shared. After that, they can log in to their dashboard via the Client Login page.
However, clients must log in through Projectopia as it redirects clients to the WordPress custom dashboard correctly.
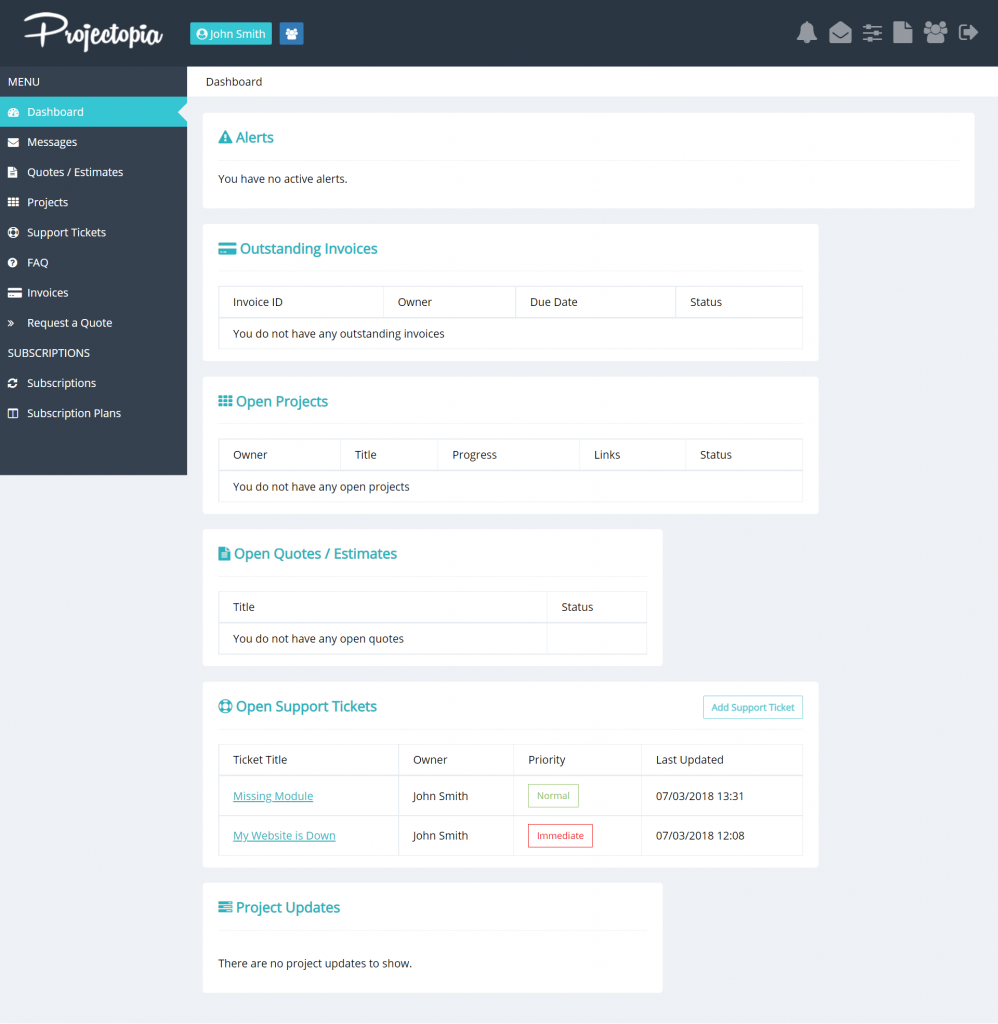
You will see a client dashboard like this.
Client Dashboard Features
Once in the Client Dashboard, you will see various features which I have explained below for clear understanding.
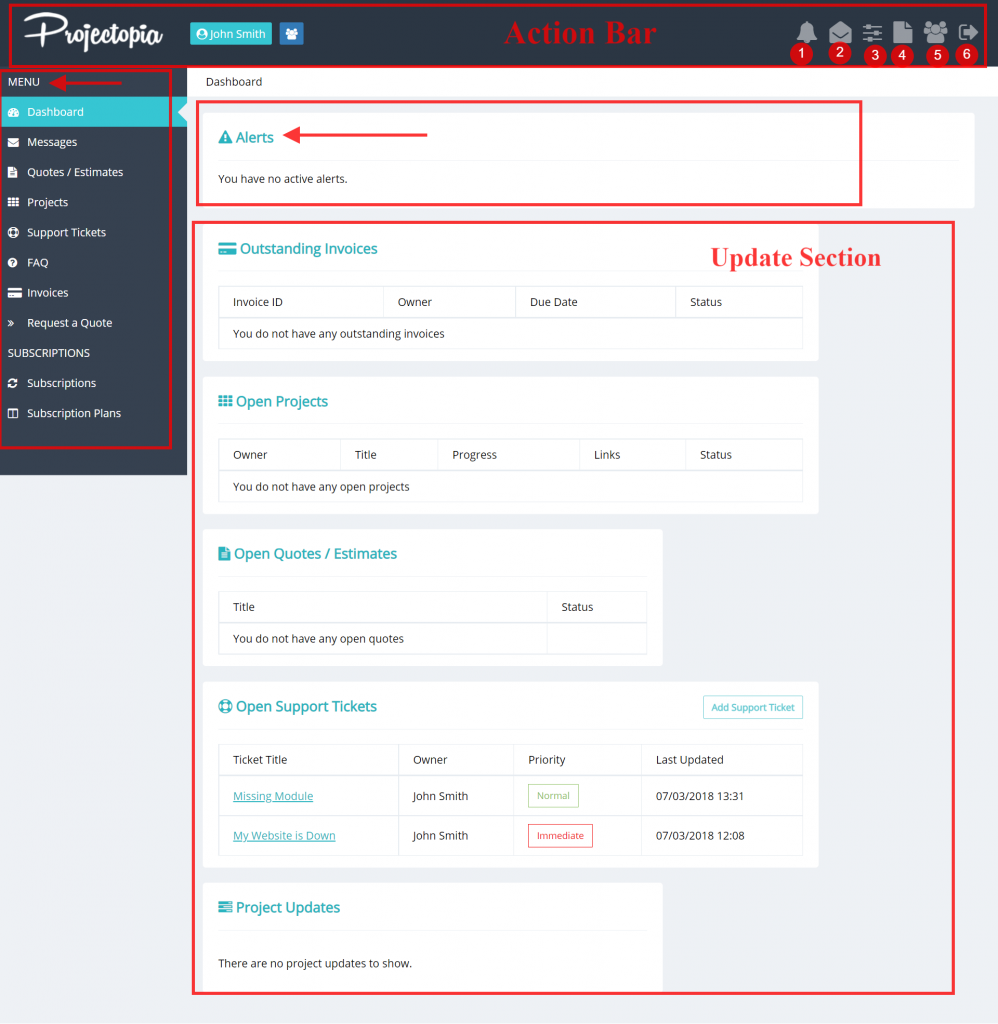
Action Bar:
You will see this section at the top of the client dashboard that contains options like:
- Notification: You will see a “🔔”(bell) icon in which you will see all the notifications. It is useful for the clients as they will be updated 24*7 about a new project being added, alerts, invoices, open support tickets, and many more.
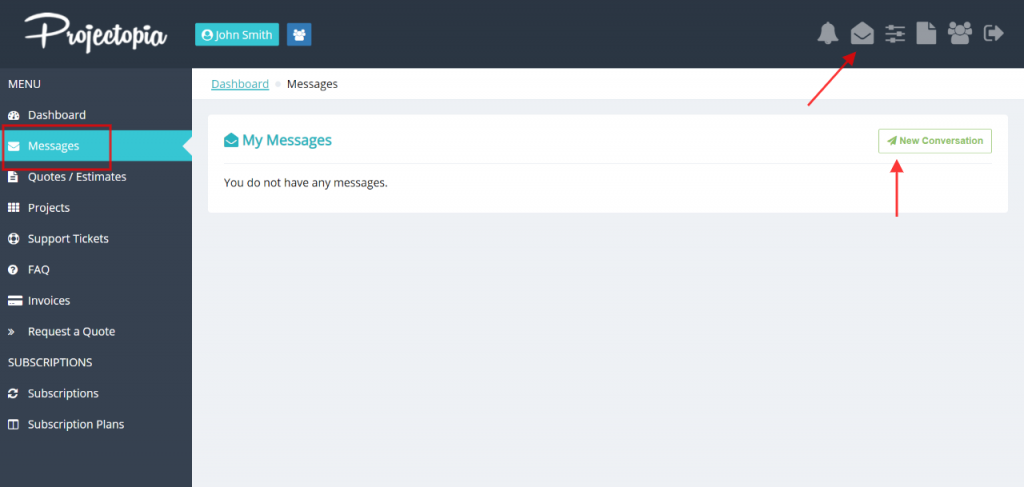
- Messages: This option is beside notification and you can also go to the message section via the “menu” side below the dashboard. Here, you can start a new conversation with a user or many users by clicking on the “New Conversation” button. Moreover, it also shows a table of conversations that includes members involved and message updates.
- Edit my Profile: In this section, you as a client can edit all the personal and company details which were created by the admin. Further, you can configure email notification preferences to update your profile.
- Client Files: Projectopia allows both admins and clients to upload documents to the Client fields (to know how you can add files click on the ‘Client fields’). It is useful as you can upload files that are important but sometimes not related to projects like agreements, NDA, and more.
- Contacts: This feature allows both admin and clients (with correct permission) to add users (client’s team members) in the same client dashboard of WordPress. Client contact (click here to know more on this topic) is one of the most useful features of the client dashboard in Projectopia for both admins and clients.
- Logout options: Exit button log out the client from the dashboard.
Alerts Bar:
This feature of the Projectopia allows admins to add alerts/warnings to the WordPress custom dashboard. To know how you can add custom alerts visit Projectopia Custom Alerts
Main Menu:
This is at the left side of the dashboard which includes Quotes/Estimates, Projects section (that includes current and past projects, tells about project progress, status, and actions taken). It also contains invoices, support tickets, and subscriptions.
Update Section:
It is the landing page that gives the client an at-a-glance view of everything the client needs to know related to the work. It includes Invoices, Open Projects, Open support tickets, Project updates, and open quotes.
(Admins can customize the WordPress dashboard for clients but the menu section and update landing page will not be available in that particular theme as it gives clients a more simple, one-page layout look. You can customize the WordPress dashboard for clients by visiting plugin settings. To know how to customize click here- Dashboard Themes)
Conclusion
I hope now you have understood how to add a client dashboard in WordPress through Projectopia.
You can also try out Projectopia Demo to know more and get a better understanding of how you can add a client dashboard and how it works.
Click here to visit the website Projectopia Demo
Click Here to Purchase Projectopia Plugin