In today’s article, we will learn to Track Project Time using Time Entries Addon in your Project Management Plugin.
If you are running multiple projects under your website, you understand the importance of time management. Efficiency can be multiplied when one learns to manage time and perform their work. In the case when you’re handling multiple users, and clients working on a particular project, time tracking is essential.
When you Track Project Time, you’ll get an overview of the project in the case of its completion such as its progress, time consumed in each step, and the completion period. Further, you can estimate the total time consumption on the project. This gives you the power to add or remove additional users in the project to complete it any time soon or late.
Usually, all the Project Management Plugins do have a time track function but they can’t be as efficient and feature-enriched as we need. This is when you need to add Time Entries and add your Project Management Plugin. This gives you the power to track Project time!
In this article, we shall explain to you one of the most powerful projects management plugins – Projectopia. Further, we will learn about Time Entries Addon and how we can use it to track Project Time.
Note: Most of the Time Entries Addons on the Project Management Plugin are quite similar. Therefore, you can take this article as a reference to use Time Entries Addon on your project management plugin and track the project time.
Time Entries Addon
Before getting into Time Entries Addon, let’s get a quick view of Projectopia and the Time Entries Addon offered by this plugin to help you Track the Project Time.
Projectopia – Best Project Management Plugin for WordPress

Projectopia is a full-featured Project Management Plugin that fits the need of Emerging Businesses, Freelancers and much more. It is a preferred plugin for businesses and individuals around the world to manage projects on their WordPress sites. The developers of this plugin make sure to make the changes and updates as per the requirements of the users.
Projetopia offers many premium Addons to add advanced features and functionalities to your project management. One of such addons is Time Entries Addon.
Time Entries Addon by Projectopia
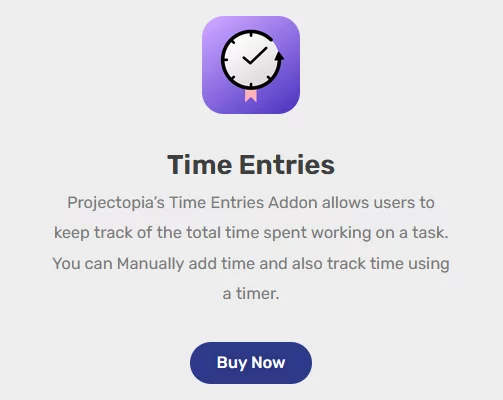
Projectopia is a free WordPress Project Management plugin. The plugin offers premium add-ons to enhance the functioning of Project management on the site. One of such Addons is Time Entries Addon. It allows users to keep track of the total time they spent working on a particular task/project. Enabling the addon, you can manually add time and track time using a timer.
Time Entries Addon provides you with the flexibility to keep a detailed eye on each of the projects accordingly. This further functions in the better and smooth performance of tasks and work completing the project on time or beforehand. The Time Entries add-on is designed to be as easy to use as possible. With just $35/year, you can purchase the addon and use it on your website.
Tracking Project Time with Time Entries Addon
By now we are sure that you have enough information about the Time Entries Addon and its uses. So without wasting any time let’s proceed further to learn the easiest way to track the project time using Time Entries Addon.
The steps mentioned in this article are simple and can be done right away along with reading! Let’s Start:
Step 1: Install and Activate Projectopia Plugin
Before we move ahead towards the use of the addon, let’s make sure that you have the plugin on your website. If you don’t have the Projectopia plugin, make sure to install it!
You can find the plugin on the WordPress Repository or Official website. You can also simply download it from the site dashboard.
Follow our tutorial guide on ‘How to Install New WordPress Plugin?’ if you’re having difficulty installing it.
Activate the plugin after the installation.
Upon the activation of the plugin, you can view the Projectopia section on the left sidebar of your WordPress dashboard.

This is the end of the first step.
Step 2: Add Time Entries Addon to your Projectopia Plugin
Projectopia Plugin offers amazing Premium Addons to make sure that your plugin includes everything to build an effective and complete project. One of them is the Time Entries Addon which will let you keep the track of total time spent while completing a certain task.
Now, the Projectopia Plugin is free, so you just need to get the premium addons to add the feature that’s essential for your project management.
Step 2.1: Purchasing Time Entries Addon
In order to Purchase the Time Entries Addon,
- Head to Projectopia>>Add-Ons
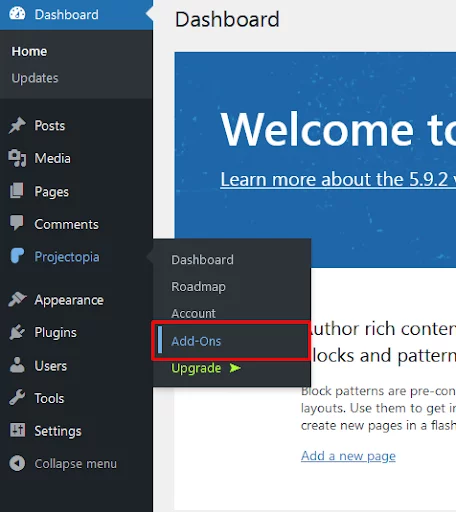
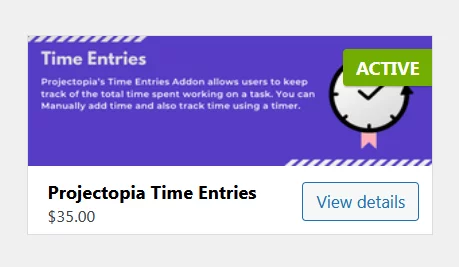
- Hover over Projectopia Time Entries
- Select View Details

- Select a suitable plan.
- Purchase the Addon
- Enter all the necessary information as asked and you’ll have the Addon purchased and ready to use.
Note: You can view all other Addons offered by the plugin in detail to purchase the necessary one for your website. This saves your time in the payment process. Even if you buy in bulk or a single Addon at a time, the payment process will be the same!
Step 2.2: Activating Time Entries Addon.
Upon the purchase of the Time Entries Addon, you’ll have the zip file of the addon downloaded to your local computer. In order to use it, you need to upload it to your website.
In order to do so,
- Head to Plugins>>Add New
- Select Upload Plugin
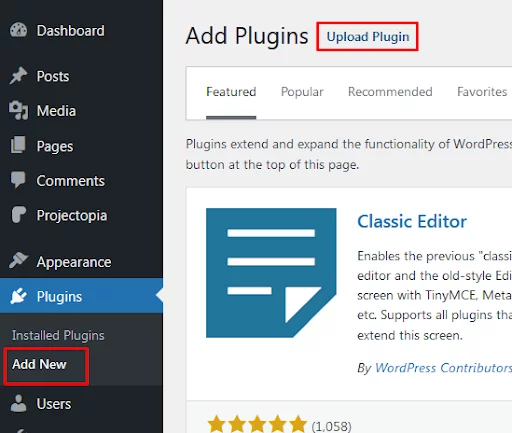
- Upload the zip file of the addon and select Install Now.

- Activate the Addon.
Upon the activation of the Addon, when you see the active status of Projectopia Time Entries on Projectopia>>Addons page.

This is the end of our second step i.e Add Time Entries Addon on Projectopia. Here we purchased the Time Entries Addon and learned to activate it on the site.
Step 3: Use Time Entries Addon to Track Project Time
Now, when you’re adding a New Project or Task on the site from Projectopia Dashboard, you’ll see the Time Entries section on the right sidebar. This allows you to Track Project Time. Let’s learn how we can do it!
- Head to Projectopia>>Dashboard
- Add New Task or Edit any of the existing tasks on the site.
Note: A project is made up of multiple tasks assigned to all the users working on it.
On the Edit, Add New page, you can view Time Entries on the right sidebar.
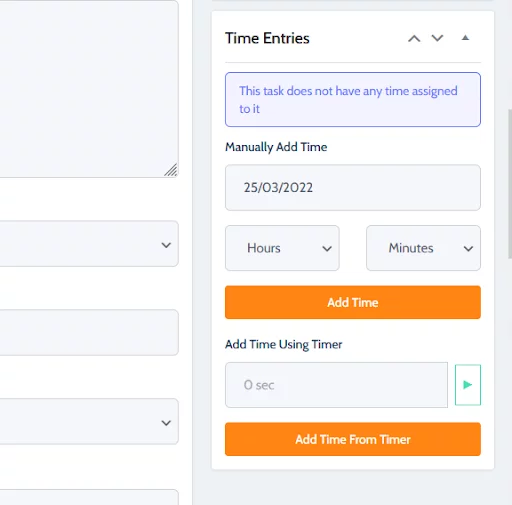
- Fill out all the information about the tasks.
Since you haven’t assigned any time to it, it shows the quoted blue text that you haven’t assigned any time to the task.
- Add Time to the Task.
You can Add Time from the Timer too. Select the preferable option.
Now, in this way you can add Time Entries to each task on the project and track the Project Time in the easiest way.
This sums up the end of our third step. Here, we learned to Track Project Time using Time Entries Addon.
Wrapping Up
This is the end of our tutorial guide on ‘How to Track Project Time with Time Entries Addon.’ Earlier we discussed the importance of time tracking in projects and how the Projectopia plugin makes it possible with the use of Time Entries Addon. Follow the guide step-by-step to get the Time Entries Addon on your site and keep track of the projects undergoing on your WordPress website.
If you feel stuck on any of the steps, do let us know in the comments section below. We would be happy to help you throughout. Also, do let us know what you think of this tutorial guide.
Also, Check-Out:
