
Do you want to learn the easiest way to add multiple milestones in Projectopia? Milestones are added in Projects to address project kickoff completed, plans approval, a record of dates, budget usage, completion of phases, and much more.
Projectopia Project Management Plugin enables you to apply pre-defined milestone templates to your quotes and projects. The milestones are generally added to the project after you are done with the basic setup of the project.
If you’re still reading this article then we are sure that you want to learn one of the simplest ways to add multiple milestones in Projectopia. Don’t worry as we will teach you the step by step guide to perform the task in the simplest way. But before beginning the process, let’s know about Projectopia- Project Management WordPress Plugin in detail.
Projectopia is the best selling project management tool that is used and trusted by 2300+ professionals to manage their projects. It is an amazing plugin that enables you to manage clients and team members in the best way possible. You won’t face any sort of difficulties while adding multiple milestones in Projectopia as this plugin is simple, easy to use and customizable. Also, this plugin provides you with awesome Premium Add-Ons to add additional features.
Table of Contents
Add Multiple Milestones in Projectopia
Without wasting any time let’s proceed forward to add multiple milestones in Projectopia as per your own requirements. Let’s start:
Step 1: Install and Activate the Projectopia Plugin
Install the Proectopia Project Management Plugin on your WordPress website.
Get your plugin from WordPress Repository or the Official website. Also, you can simply download it from the site dashboard.
If you are a beginner and you don’t know the simplest way to install a plugin go through our tutorial ‘How to Install New WordPress Plugin’
After Installing the plugin make sure to Activate it.
Once the plugin is activated, you’ll be able to see the Projectopia section on the left sidebar of your WordPress dashboard as shown in the screenshot below.
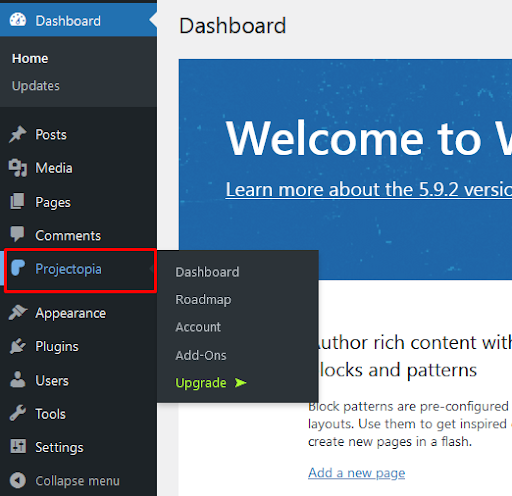
This is the end of our first step to Install and Activate the Projectopia – Project Management WordPress Tool.
Step 2: Add a Project
- In order to create a project hover over the Project link on the Admin menu.
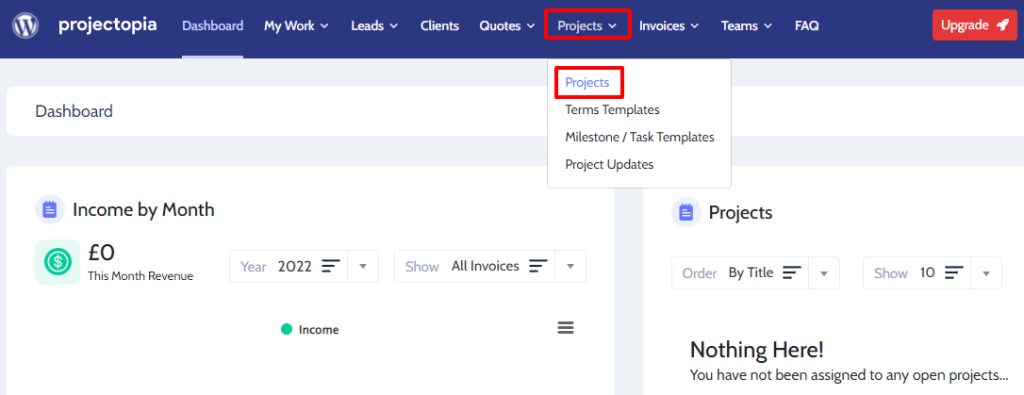
- Then click on the New Project button at the right top of the page.
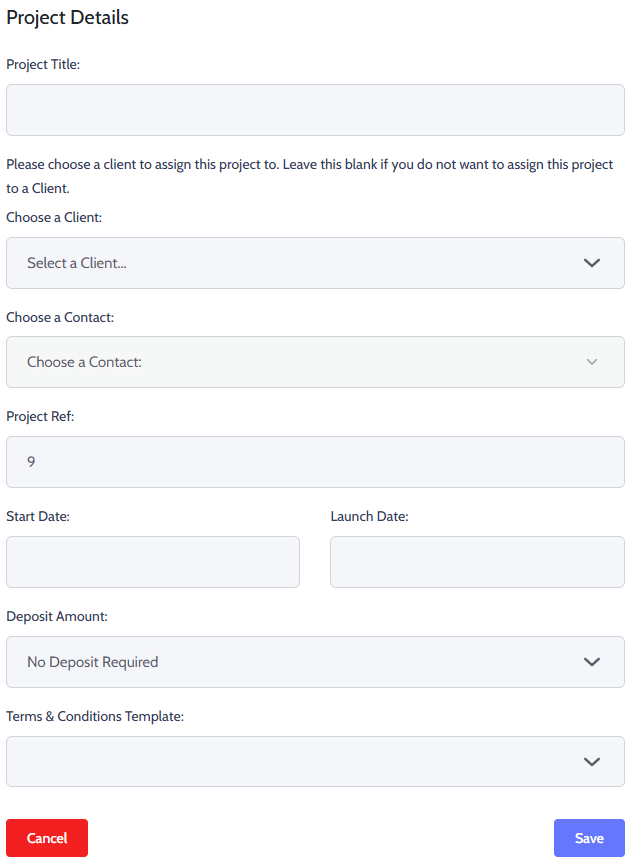
- In the Project Details make sure to add Project Title.
- Then choose a Client and Contact
- Select the number for Project Ref.
- Make sure to choose the Start Date and Launch Date.
- Select the Deposit Amount and Terms & Conditions Template.
- Finally, click on the Save button the save all the changes that you have made recently.
This is the end of our second step where we learned to add a new project using the Projectopia plugin.
Step 3: Adding Multiple Milestones in Projectopia
As we are done with the basic setup of the project, we can now add milestones to it.
In order to add milestones in Projectopia, we will make changes in the Milestones & Tasks option at the
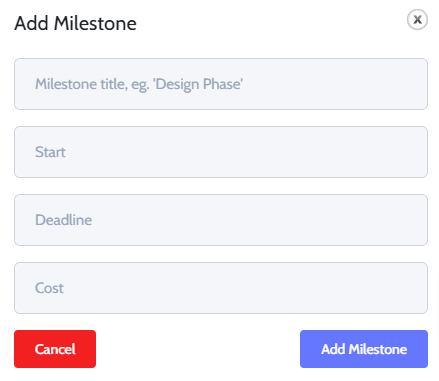
- On the Milestones & Tasks click on Add Milestone button.

- Now you’ll be presented with a modal window. Make sure to add Milestone Title and Start & Deadline Date.
- Once you’re done click on the Add Milestone button.
Finally, this is the end of our third step on adding milestones in Projectopia.
Note: Add as many Milestones as you want. If you want to reorder, click and hold the blue reorder button on each of the milestones that you have created. You can also edit and delete milestones by clicking the orange and red buttons. Also, note that deleting a milestone will also delete tasks that are attached to it.
Wrapping Up:
This is the end of our tutorial guide on ‘How to Add Multiple Milestones in Projectopia’ We hope this article helped you to add milestones to your project without any kind of hassle. All you need to do is follow these steps without missing any of them.
If you have any kind of confusion while following this step by step guide, feel free to ask about your queries in the comment section below.
Feel free to share your experience with us!
Also, check out: