Activating a Subscription
Once a client has their first subscription in their dashboard, either one that they have subscribed to themselves (See Subscription Plans) or one that has been added by an admin (See Adding a Subscription), the first thing they need to do is activate it. The activation process is required because this is where the client’s payment details are captured.
Subscriptions are found under the Subscriptions link in the client dashboard. Any that require activation will have an “Awaiting Activation” label.
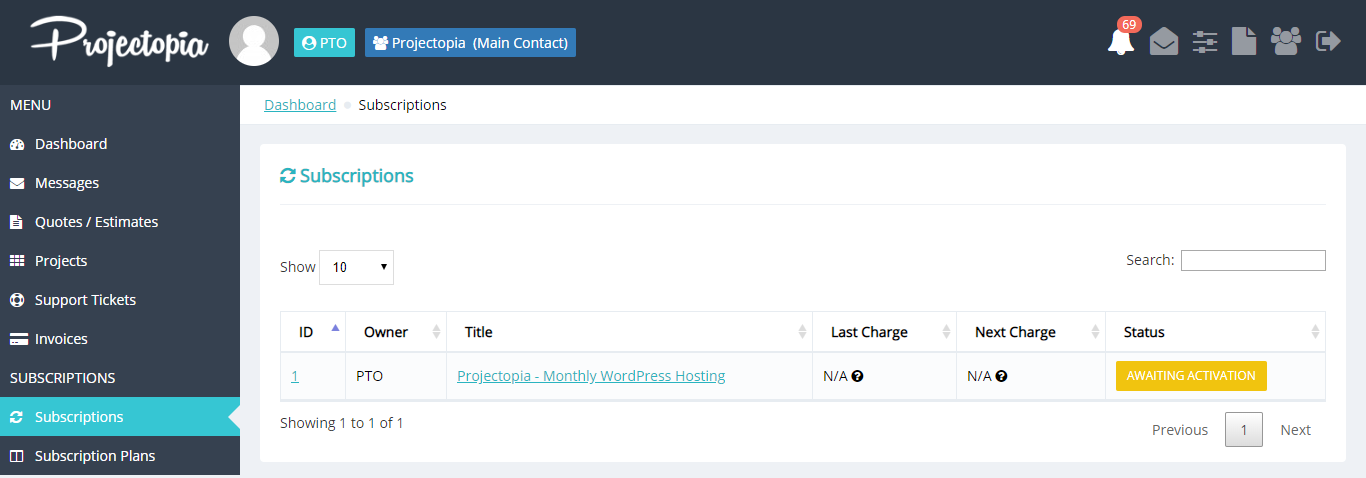
To activate a subscription, click on the link in the Subscriptions table to go into the subscription. There will be an activation button underneath the information in the right sidebar (Stripe or PayPal, depending on the option selected)
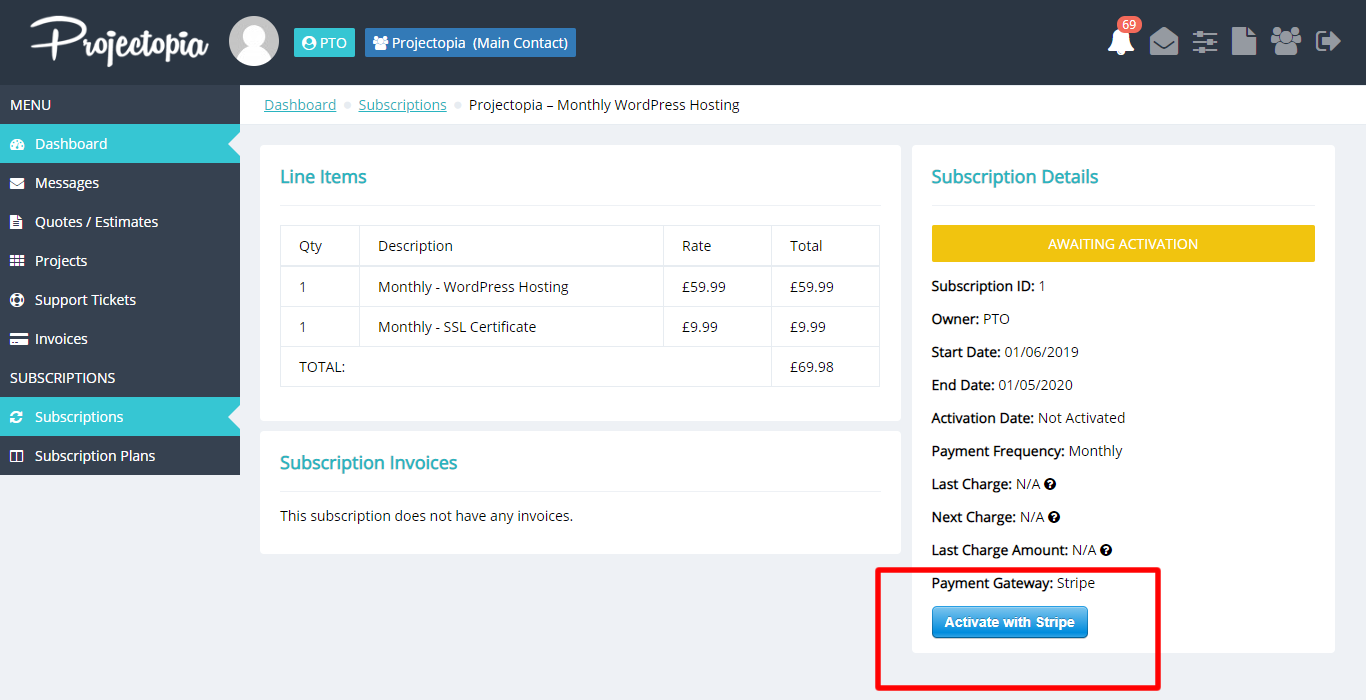
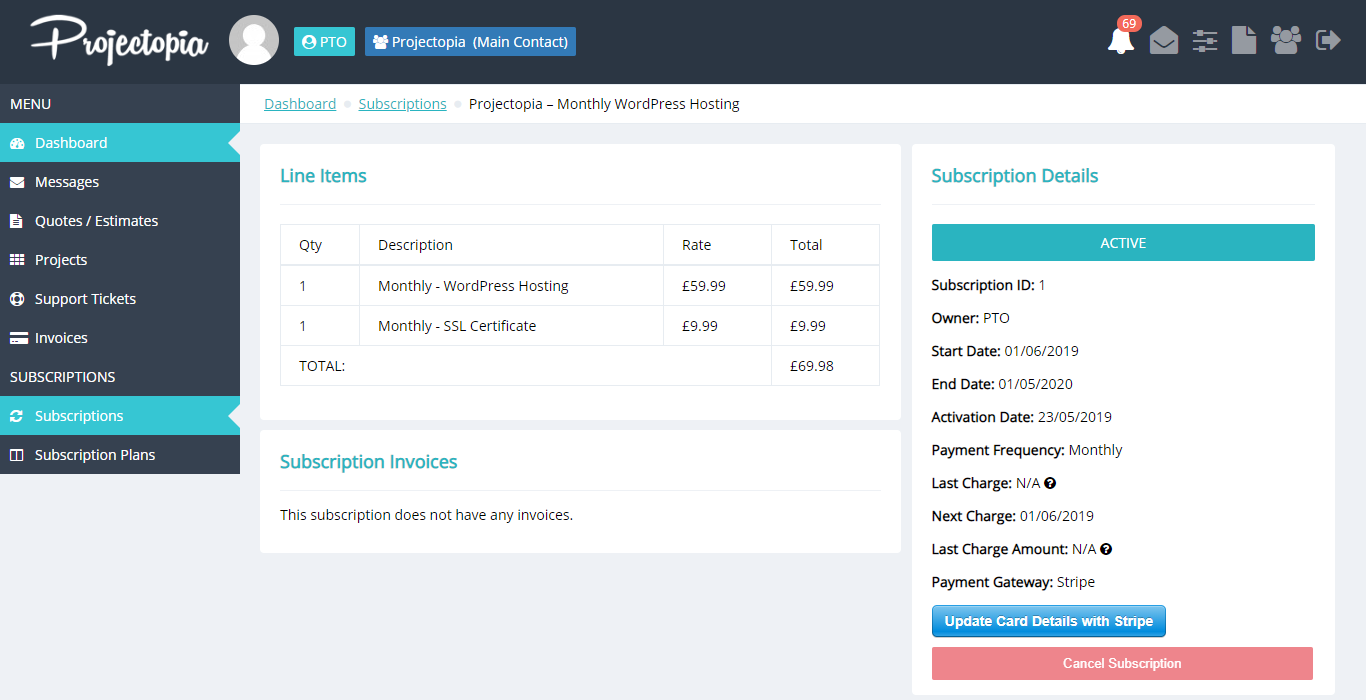
Click the activation button and follow through the process to enter the payment details for the subscription. Once the process is complete (either via PayPal or Stripe), then the client will be returned to the dashboard and the subscription will be activated. It will now bill from the start date (unless the start date was left blank, in which case it will have billed already)
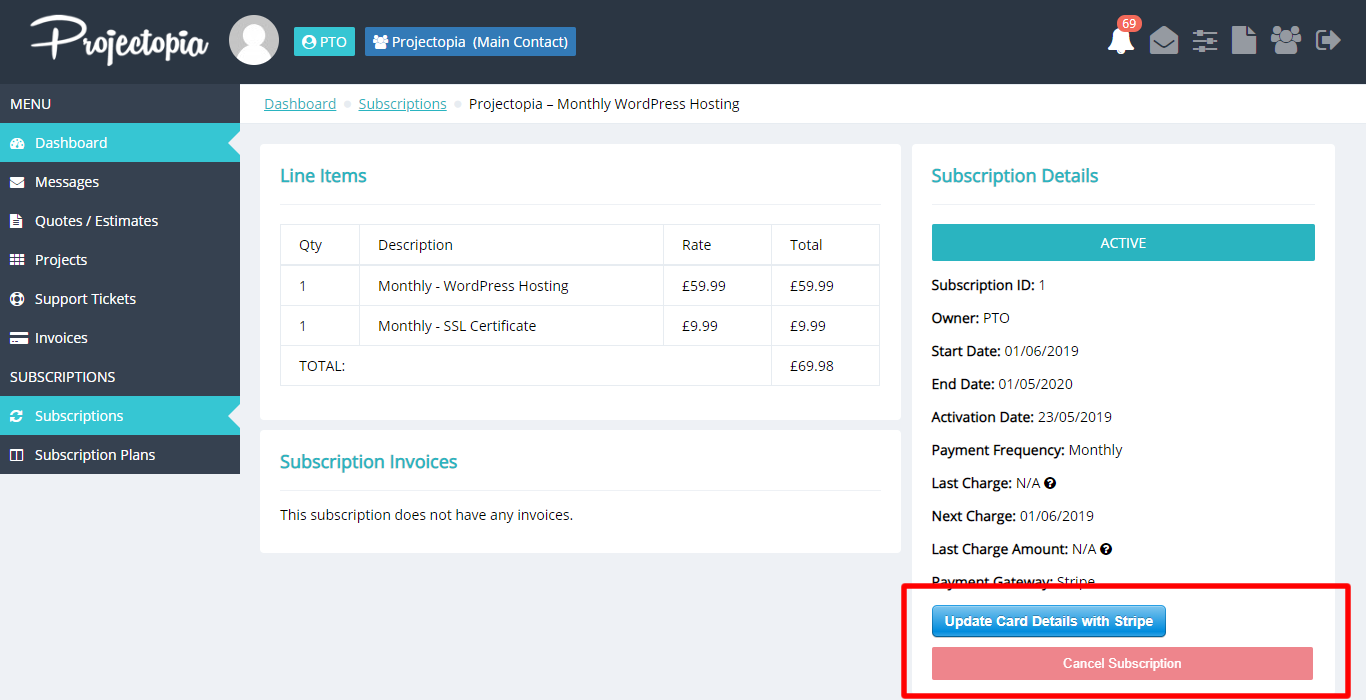
Updating Payment Details / Cancelling a Subscription
If a subscription fails then the client will receive an email to inform them that their card details need to be updated. Please note that the plugin does NOT attempt to charge again after failure, it will simply mark the subscription as overdue and inform the admin and the client.
To update payment details, simply enter the subscription from the client dashboard and click the “Update Payment Details” button. This button will be either a Stripe button or a PayPal button, depending on which has been chosen to bill the subscription.
The client can also cancel the subscription by clicking the Cancel Subscription button.