Quotes
Quotes are used in Projectopia to provide clients with an outline of proposed work to be completed. In essence, they are the start of the project workflow.
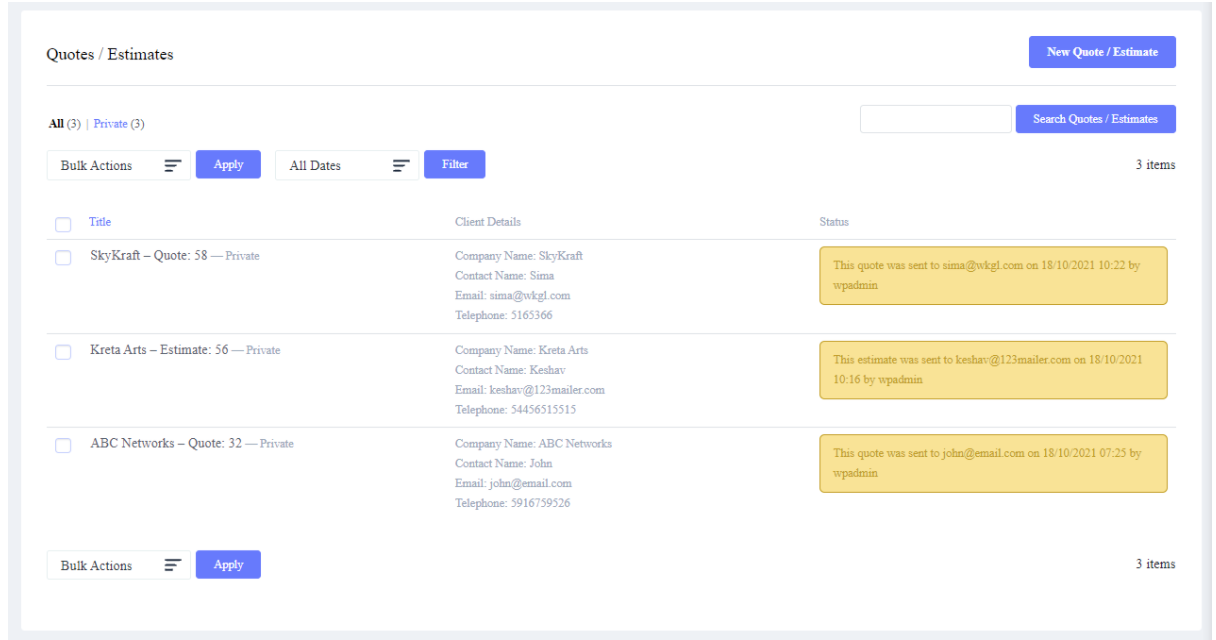
With Projectopia you can generate and manage quotes/estimates. To view all the quotes/estimates that you generated navigate to Projectopia > Quotes. Here you will be presented with a list of all the quotes/estimates that you added with the Title, Client Details, and their corresponding statuses.
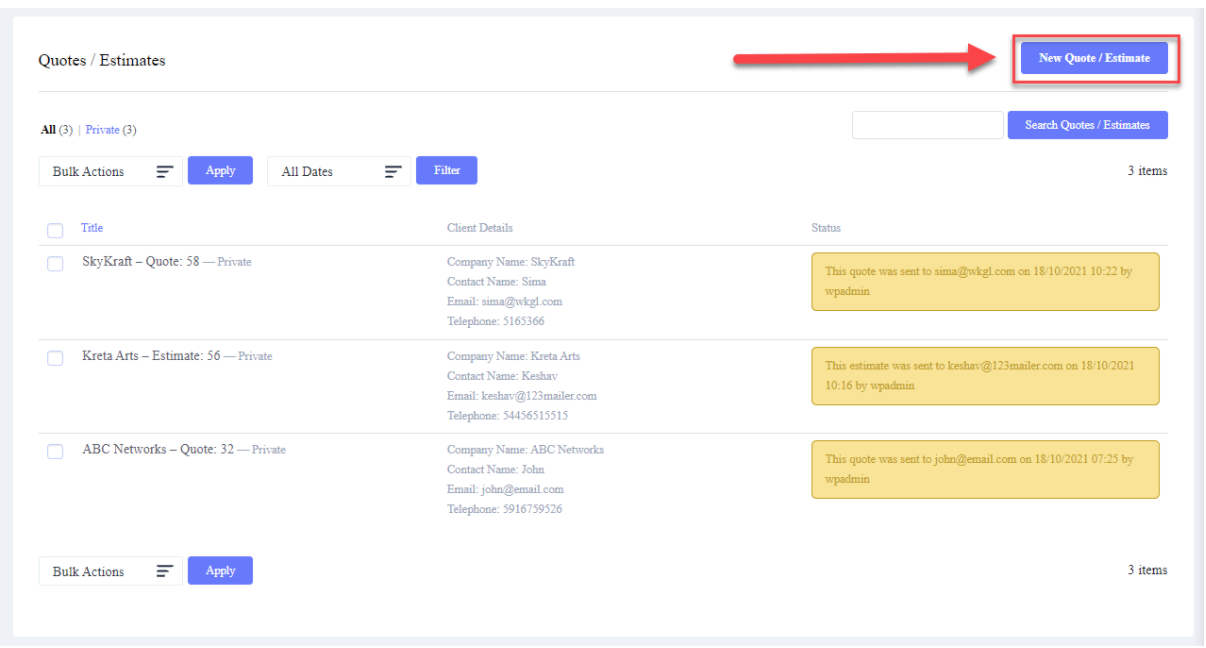
With the “New Quotes/Estimate” button you can add new Quotes/Estimates to this list. View the “Quotes/Estimate” Generation Document.
The next series of articles explains how to create a quote, add information to that quote and ultimately get it sent to the client for approval. Once a quote has been accepted by the client then it is converted to a project.
New Quotes Generation
To create new Quotes/Estimate navigate to Projectopia > Quotes > and click the “New Quote/Estimate” button.
Quotes are used in Projectopia to provide clients with an outline of proposed work to be completed. In essence, they are the start of the project workflow. The next series of articles explains how to create a quote, add information to that quote and ultimately get it sent to the client for approval. Once a quote has been accepted by the client then it is converted to a project.
There is some information that needs to be collected in order for a quote to be properly set up. You’ll be directed to a modal window to enter this required information.
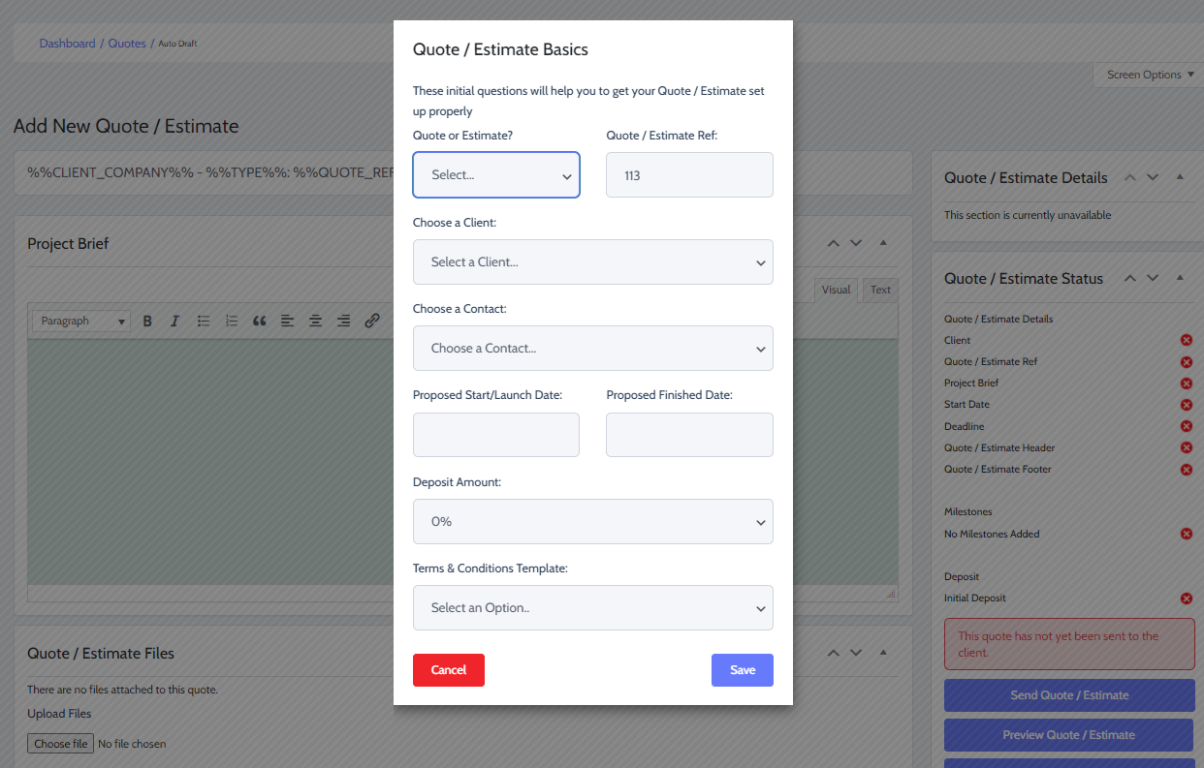
On this page you need to select –
Quote or Estimate – These are effectively the same besides the labeling that the client will see. If you choose Estimate then the client will also be informed on the quote that costs are estimated and may be more / less than the estimated costs.
Quote / Estimate Reference – By default, this will use the WP Post ID, but you can enter any reference that you wish in this field.
Choose a Client – Select a Client from the drop-down if you have already added a client to any of your projects.
Client & Client Contact – Choose a client and a client contact to assign the quote to. If the client does not have additional contacts then the main contact will be selected automatically.
Start / End Dates – These dates are required and will give the client information as to when the project will be executed. These dates will be copied over to the project on acceptance of the quote.
Deposit Amount – If you take a deposit in advance from a client then you should choose a percentage here. If a deposit is selected then the client will be sent a deposit invoice either upon accepting the quote or accepting the contract in the resulting project. See Project Contracts and Invoice Workflow for more information.
Project Terms & Conditions Template – Projectopia allows you to choose from multiple T&C templates for your quotes and contracts. You can choose one here. If you have set up the plugin to show this on the quote then it will be added when the quote is sent, otherwise, it will be added to the contract of the project that is created when the quote is accepted. See Contract Terms Templates and Project Contracts for more information.
When you’re done, click the Save button and move on to Adding Milestones and Tasks to a Quote