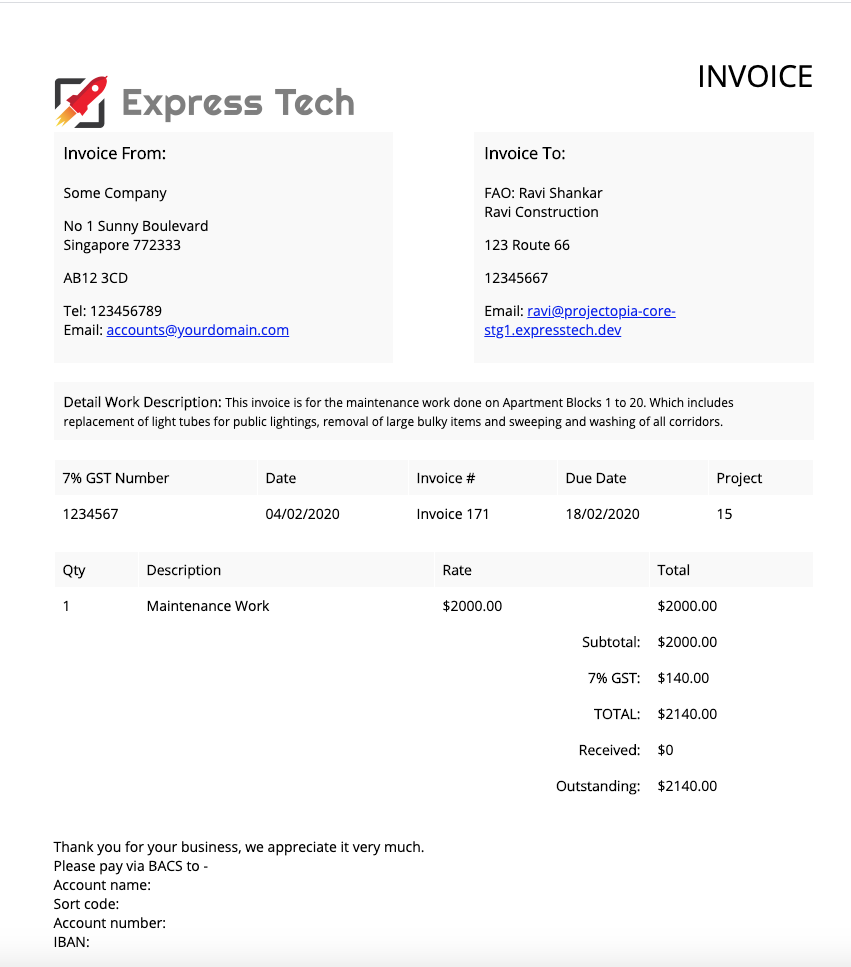
Projectopia’s custom fields for invoices, allows you to add more information to your invoice. The additional information will be shown above the line items in your invoices.
- The following are the steps to create your custom fields for your invoice.
- Login to your PTO admin dashboard
- Go to Settings -> Custom Fields
- Find the dropdown option -> Currently managing.
- Select -> Invoices
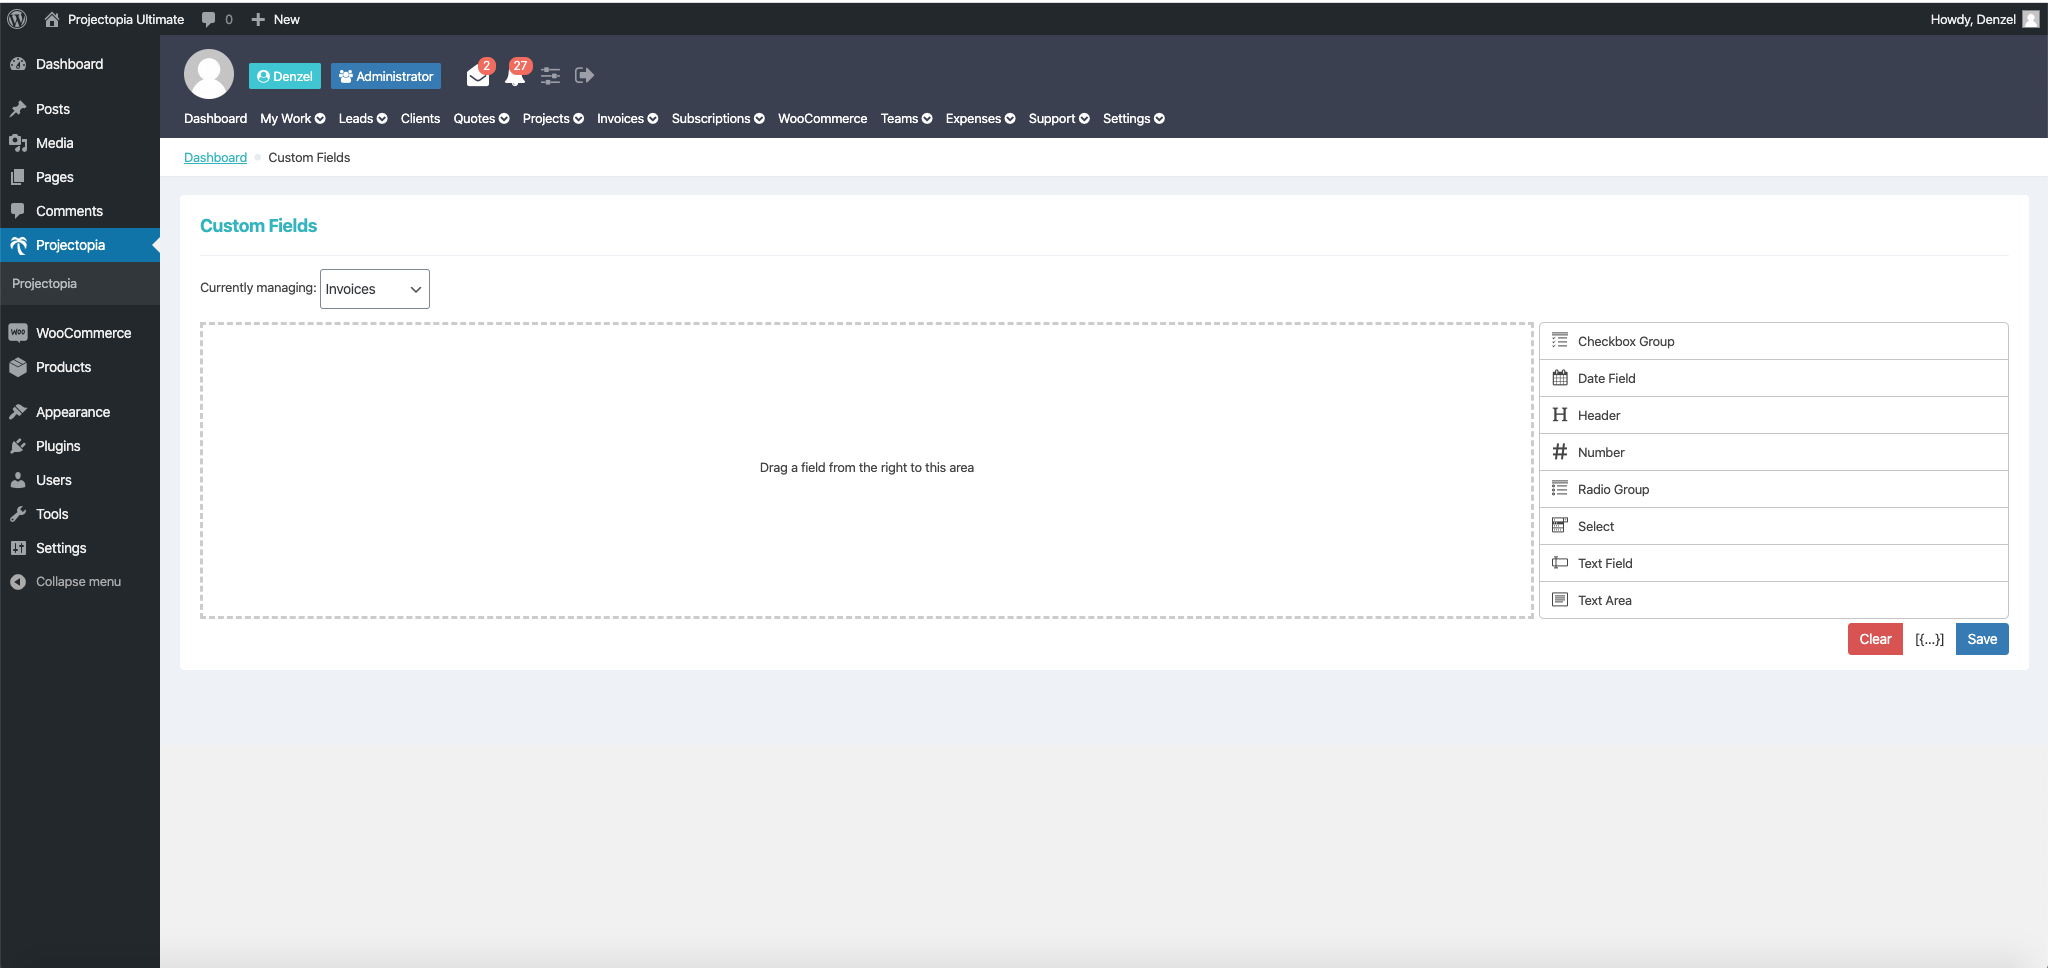
- On the right, you will find the choice of form inputs.
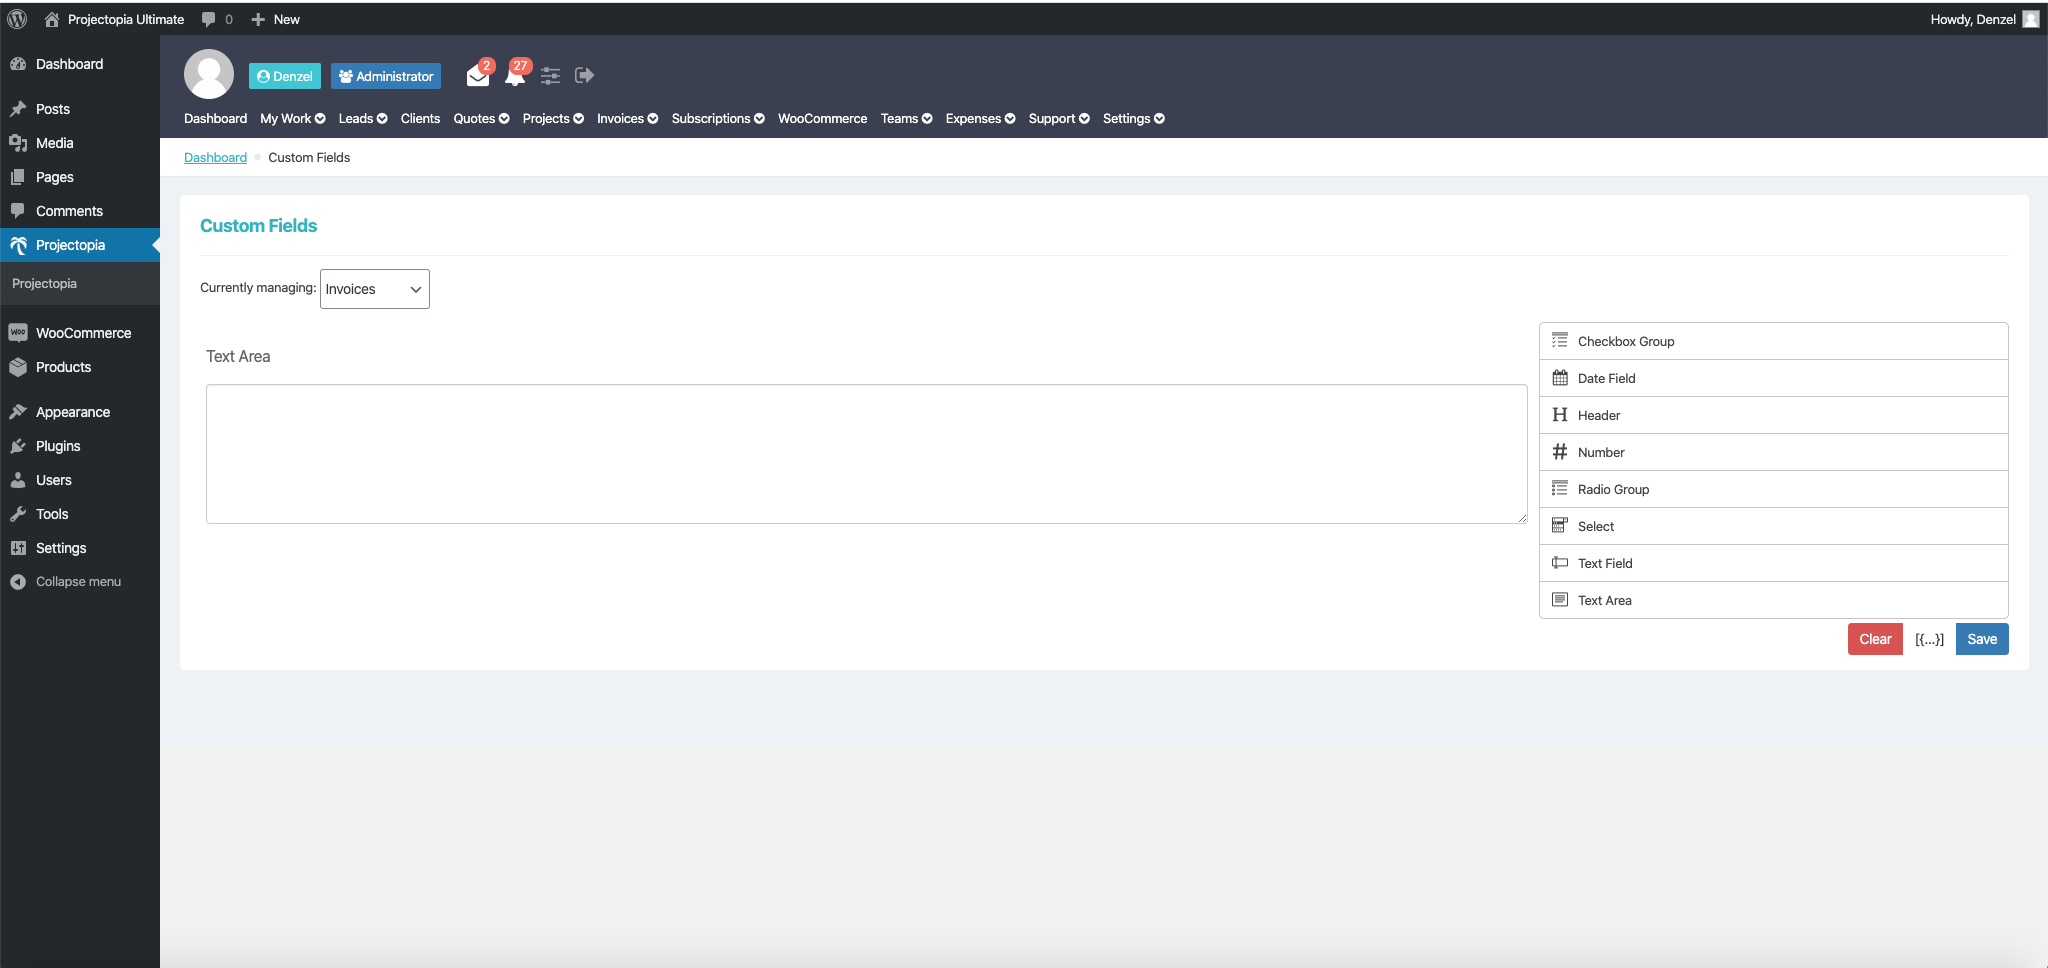
- Click on the text area form input and it will appear in the content area.
- Hover over it to find an edit icon.
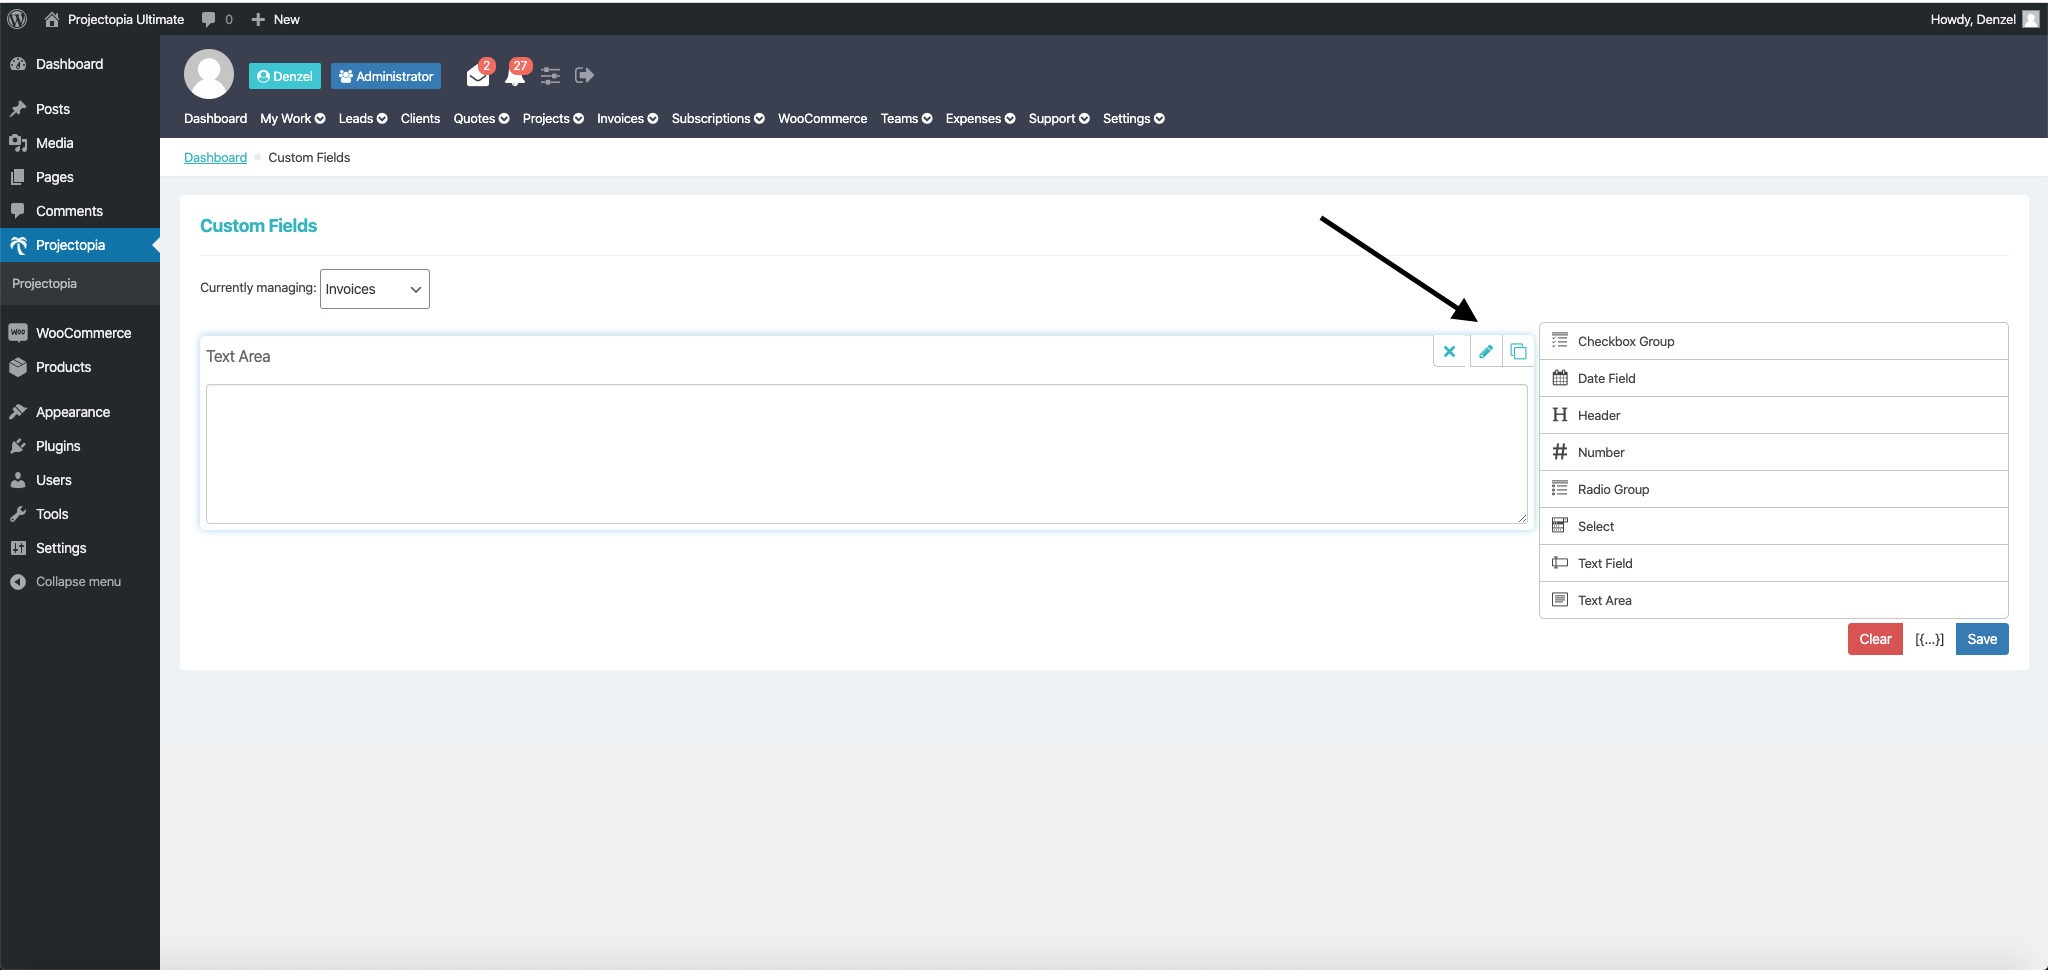
- Click on it, and you will be able to add in your label, help text, etc. For this example, I will be adding an input for detail work description.
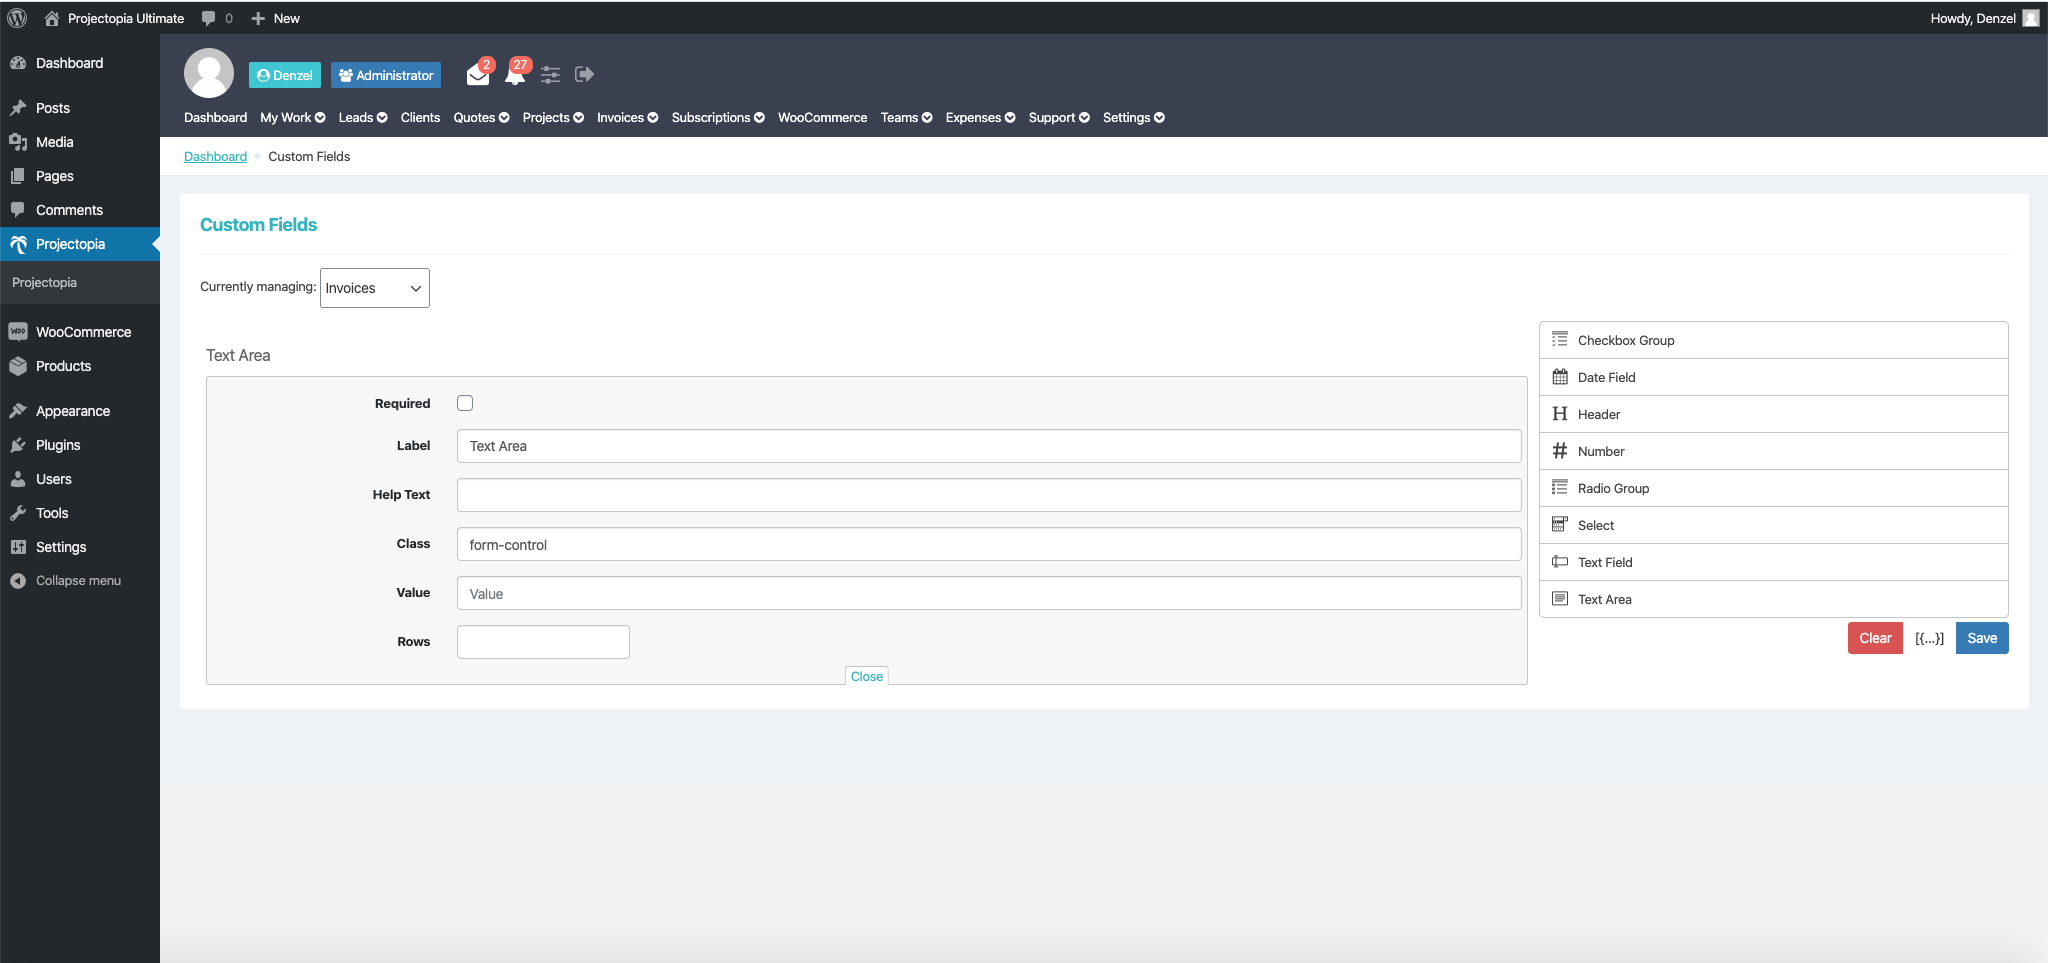
- Click on save when you are done.
- Next, proceed over to Invoices. Add a new invoice and you will see the above form input in the custom fields metabox.
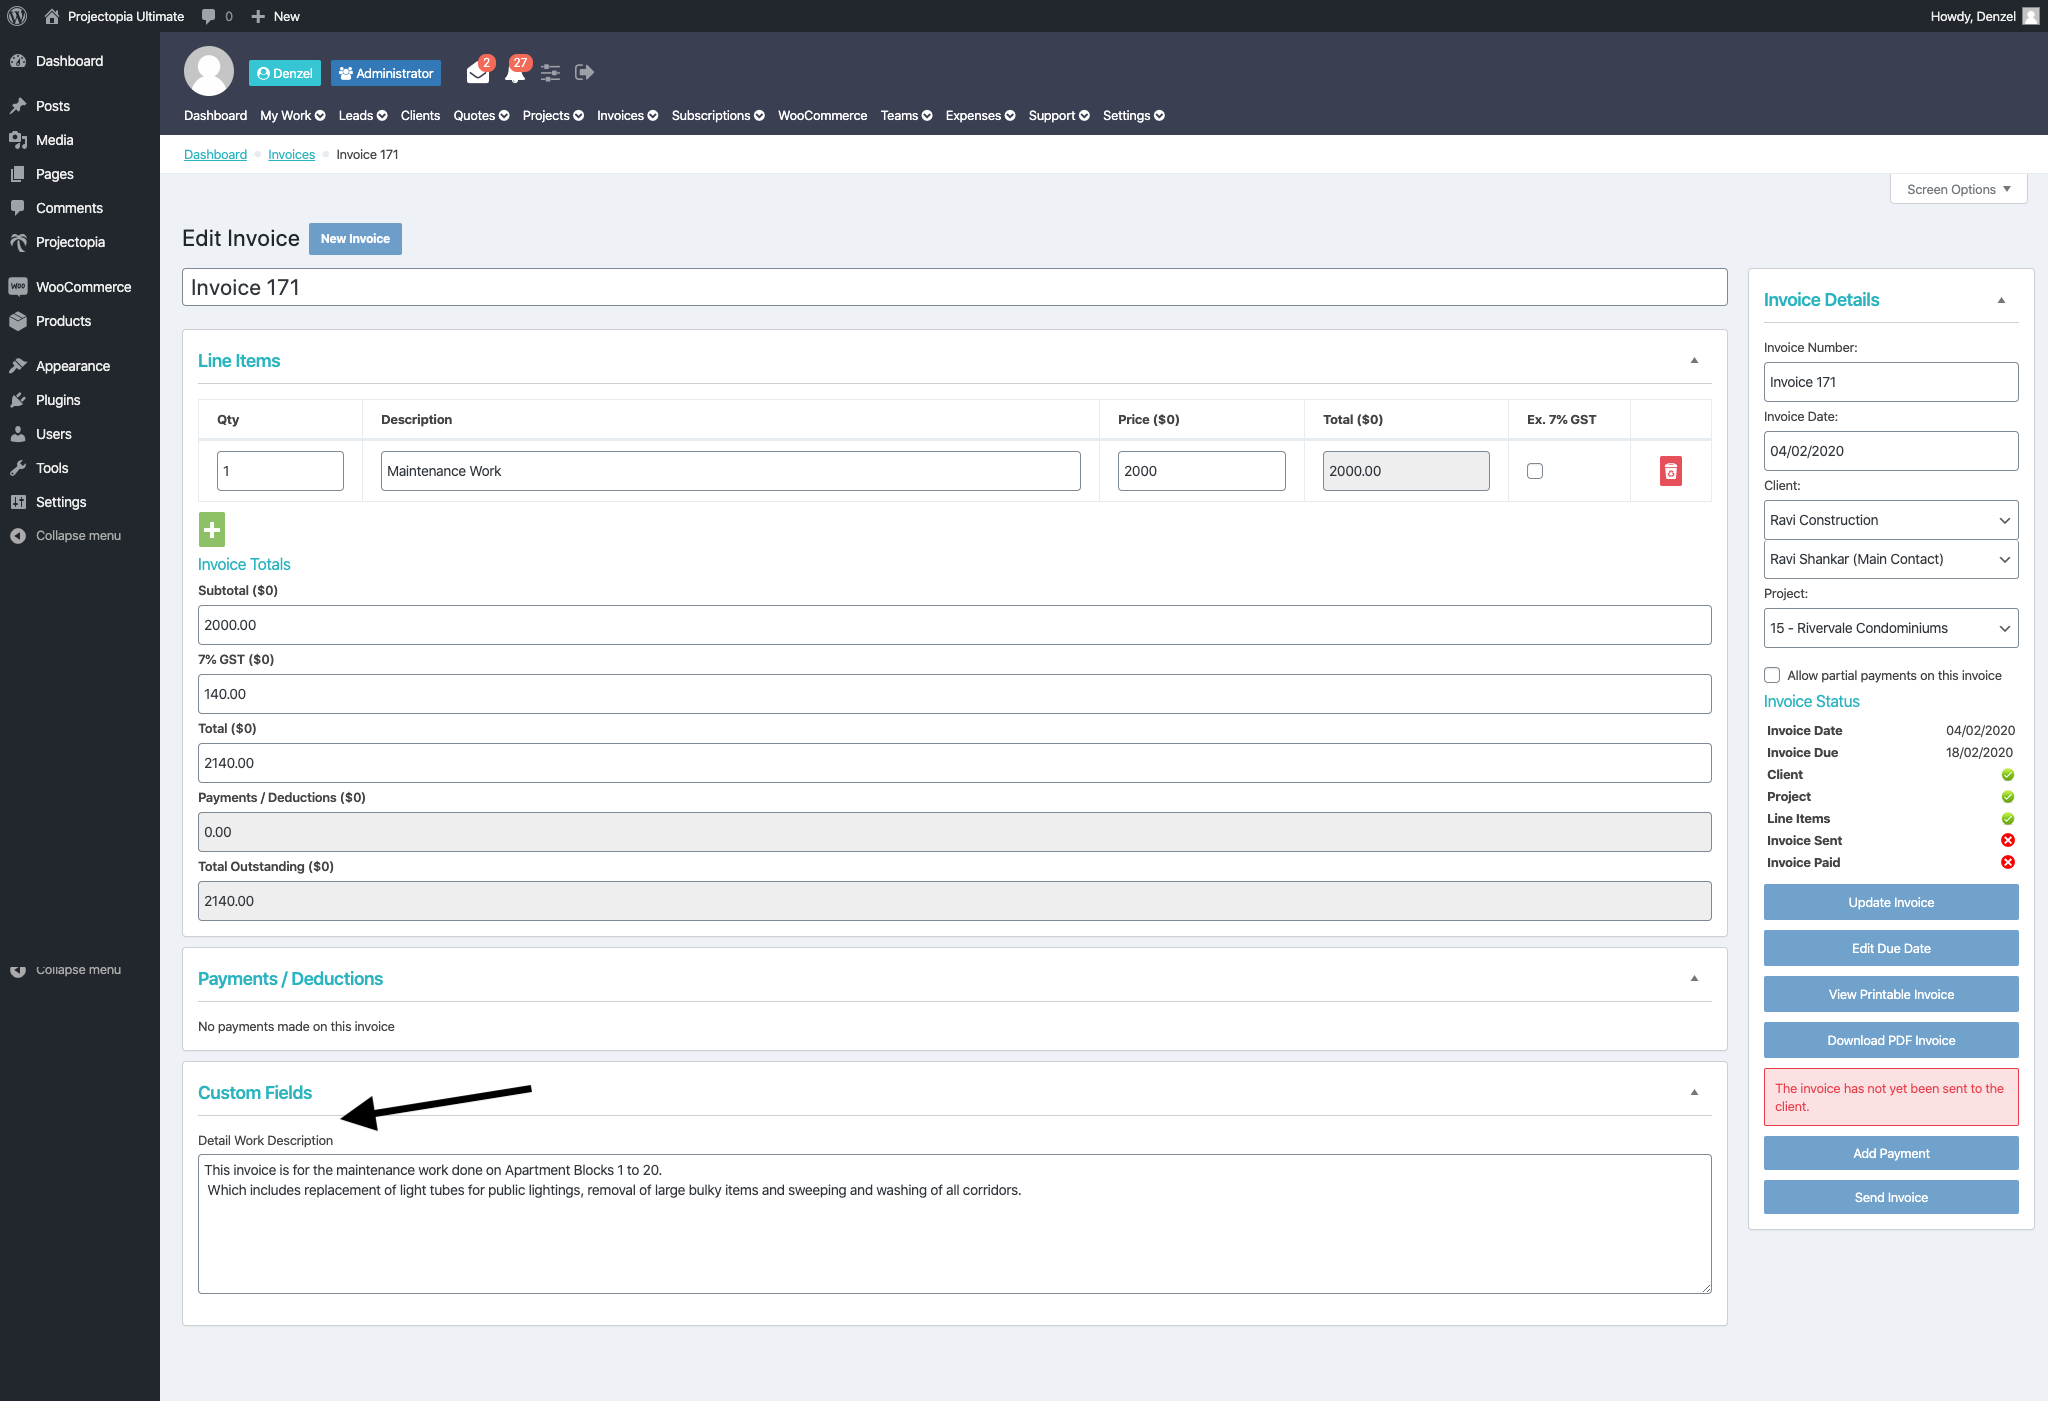
- Click on update invoice when you are done adding your content to the custom field input.
- This is how it will look in your invoice.