
Project management isn’t just about adding projects or creating a task. An important activity is to create invoices and send them to the client.
Projectopia 4.1 gives you the ease to create invoices in a few clicks. The project admin can visit the dashboard and under my invoice tab, create an invoice to get started. Creating invoices through the portal makes it easy for the admin as well as the client to keep track of the payments, manage and monitor them on the go.
To get started:
- Click on the dashboard and scroll down to my invoice section.
- To the upper right, you will see Add New Invoice Option.

- Click on it to move ahead.
- In this new page, you will need to fill the details of the invoice.

- Add Title: Give the invoice a name.
- Invoice number: increment the number based on the total invoices created.
- Invoice date: Select a date from the calendar to set a date.
- Client: Select the client, one whom you want to send the invoice.
- Contact: Select the main contact for that client.
- Project: select the project
- Partial Payment: Select the checkbox if you want to allow the client to pay in installments.
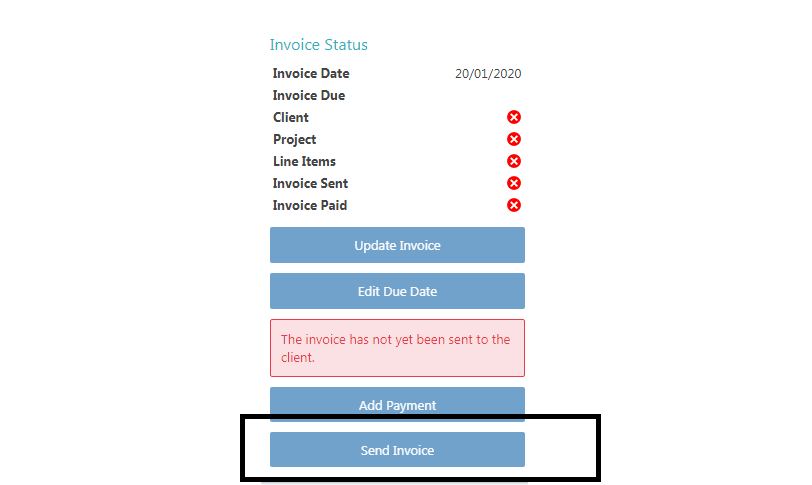
- Finally, click on the send invoice to send it to your client.
NOTE: If your client is not able to receive the email notification, please check that your client’s billing email address is valid in your client details.